
There are occasions when even a hard-nosed photo backpack user like myself must resort to a shoulder bag. In these times, sadly, backpacks may be seen as something other than the innocent carriers of your photo gear. There’s even one institution here in Chicago, namely Shedd Aquarium, where I’ve had the unfortunate experience of a security person literally ripping through my MindShift Gear photo pack to gain access, instead of simply using the zippers as intended – or asking me to open the bag. Happily, no harm done, except for some frayed nerves on this side of the inspection table (good thing MindShift uses high-quality hardware that resists such mistreatment). It was more intrusive than past TSA inspections I’d experienced (although maybe not as bad as some recently reported).
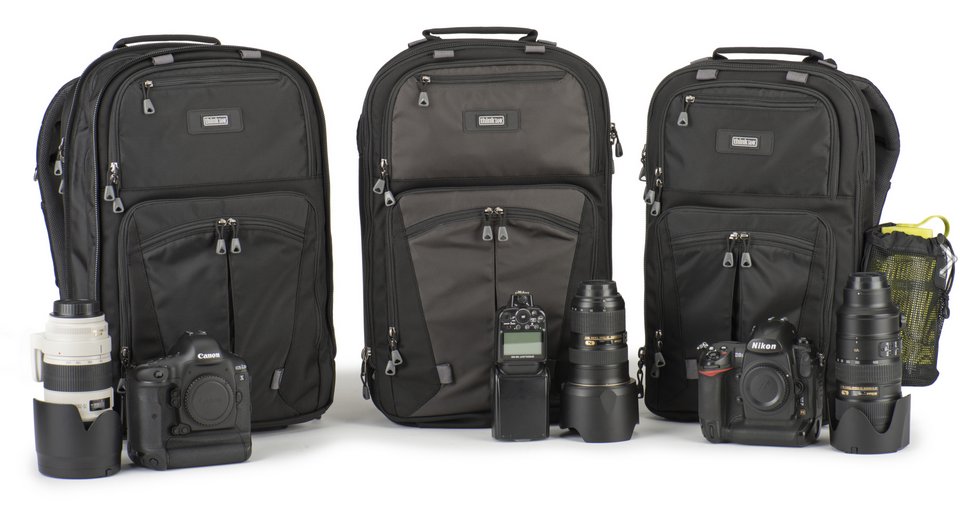
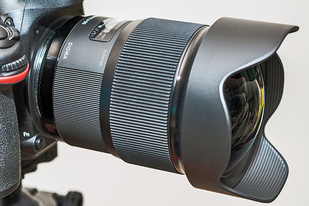
In the past, I was very happy using my Think Tank Retrospective 5 Leather bag, although over time I’d come to realize the small size was both a boon and a bane, keeping me from carrying too much but often proving too small for anything more than the minimum of gear. Even a 15-30 f/2.8 or 70-300 attached to a DSLR was too much and the 24-70 f/2.8 on the camera just barely made it. So it was time to trade up.
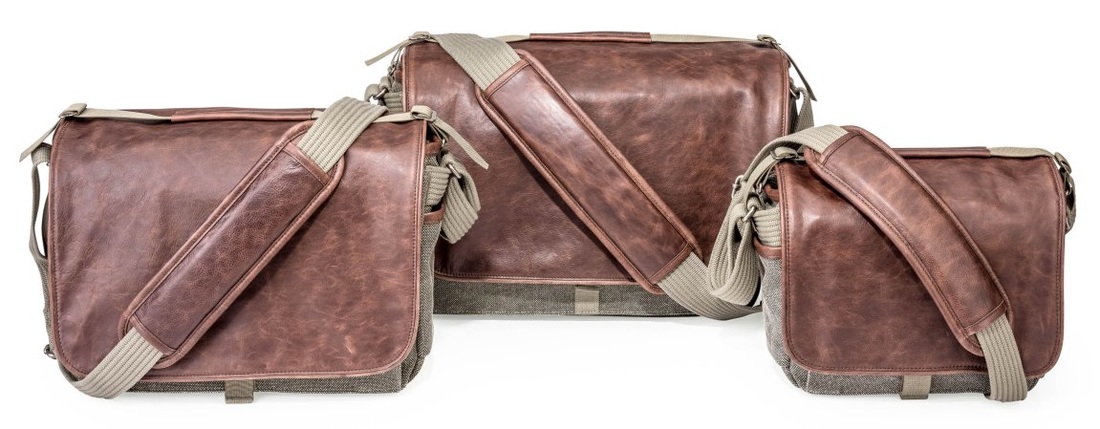
Thankfully, the Signature series entered the scene. Here I had a choice between two sizes. And this time I opted for the larger bag for one very good reason: The bag was longer and deeper than the Retrospective, but it still maintained a slim profile. That would remove the temptation to overfill the bag and also meant it would ride comfortably at my side, without bulking out.
What’s more, as I was soon to find out, I could shift the bag around to my back when wearing it sling-fashion. Of course, as a shoulder bag, it lends itself nicely to being worn over the shoulder. In fact, this bag is almost perfect. Almost.
In the past, I was very happy using my Think Tank Retrospective 5 Leather bag, although over time I’d come to realize the small size was both a boon and a bane, keeping me from carrying too much but often proving too small for anything more than the minimum of gear. Even a 15-30 f/2.8 or 70-300 attached to a DSLR was too much and the 24-70 f/2.8 on the camera just barely made it. So it was time to trade up.
Thankfully, the Signature series entered the scene. Here I had a choice between two sizes. And this time I opted for the larger bag for one very good reason: The bag was longer and deeper than the Retrospective, but it still maintained a slim profile. That would remove the temptation to overfill the bag and also meant it would ride comfortably at my side, without bulking out.
What’s more, as I was soon to find out, I could shift the bag around to my back when wearing it sling-fashion. Of course, as a shoulder bag, it lends itself nicely to being worn over the shoulder. In fact, this bag is almost perfect. Almost.
Stylish Design
Think Tank seems to have reinvented camera bag fabric when it came to the Signature series. This is a softly textured polyblend with the feel of finely woven wool. Unlike the Retrospective, this bag does not use Velcro-style hook-and-loop fasteners on the outside. In fact, I’d caution you to keep Velcro away from the exterior, as it may ruin that clean look (and, no, I didn’t test it, out of fear of ruining the bag). And if you’re wondering, the bag has been treated with a water-resistant finish. That aside, there is a rain cover included, which came in handy when I found myself pelted in a downpour.
Enhancing this bag’s sophisticated appearance are leather accents. Soft leather graces the bottom of the bag. And there is leather on the carrying handle and shoulder strap, as well as the fastener straps. The buckle fasteners are metal, not plastic, further heightening the impression of quality.
Advancing the impression that this is a well-crafted bag is this: There is not one stitch out of place, not one loose thread.
The Interior
This is where the Signature bag really shines, for the most part. The entire interior is Velcro-friendly. You can reposition the padded dividers to your heart’s content. Better still, they are more heavily padded than the typical Think Tank dividers. What’s more, the two central dividers are supportive enough to hold a camera upright, with attached lens facing downward. And if you feel you need more dividers, they’re included. I originally put these in storage, since I found the original set of dividers did the job well enough.
Two things I did not like about the interior centered on the bottom of the bag. Instead of one contiguous cushioning base, there are two, what are essentially, padded dividers lining the bottom. And the bag lacks a stabilizing bottom platform to help keep the bag’s shape and prevent a sagging bottom, while offering enhanced protection to gear. So, I pulled the three extra padded dividers from storage and lined the bottom of the bag with them. Now the bag is firmer at the base and offers even better protection for my gear.
Keep in mind that a soft-sided bag is intended to be pliable. A heavily padded, stiff outer shell would make the bag less convenient to carry. The back of this bag is the most heavily padded, enough so as to cushion you against bumps and practically prevent anything from bulging out intrusively. The front of the bag is more pliable, so keep the top of the camera to the front. That also places the grip on the right, for a quick grab.
There is enough room in the Signature 13 for me to keep a BlackRapid sling strap attached to my Nikon D610. BlackRapid straps tend to protrude more than most sling straps when attached to a camera body, which is why it’s worth noting.
A couple of more points worth noting. Unlike the Retrospective, the Signature bags feature an interior zippered lid. Keep this zipped when on the move, prior to reaching your destination or when in iffy spots to keep out prying hands.
In theory, the top flap fully covers the top of the bag. In practice, the sides bulk out just enough to leave a tiny bit of the interior exposed on each side. Which is why you may want to keep the inner lid zipped when moving about, or in situations where dirt or debris or errant water drops or snowflakes might enter the bag.
And speaking of this inner lid. I would have preferred two zippers to make it easier to open and close more rapidly. That aside, Think Tank thoughtfully designed it so that it could be attached to the main flap for quick opening when unzipped. And they’ve added another option: You can tuck the lid inside the bag, so it remains out of the way entirely. I prefer the first approach, since you can leave it attached to the main flap and still zip it open and closed. This inner lid, by the way, is pleated, making room for a lens that may stand taller than would ordinarily be accommodated.
| In Use At the outset, I loved that I had room to store a DSLR with attached lens on a dedicated support system (composed of two sturdy padded dividers, each with an overhang). You can position the overhanging lip facing inward or outward, depending on what you’ll be storing in the modules on either side. Keeping the camera/lens in the center also provided better balance. Another aspect of the bag that I truly admired is the shoulder strap. Conventional shoulder straps use an extra-wide pad that slides all over the place and has to be constantly readjusted. The padded section of the Signature shoulder strap is just wide enough to be comfortable whether worn over the shoulder or sling-fashion. Beyond that, not only is it fixed in place but it also occupies much of the strap. So, you never find yourself having to adjust the shoulder pad. It’s simply there all the time. Where can I get more info? Think Tank Photo Signature 13 Manufacturer (use this link to order): Think Tank Photo How much is it? $279 | Who Should Use This? Photojournalists, news photographers, documentary photographers; street photographers; travel photographers; pro and consumer alike. Capsule Comments Thoughtfully designed and fashionable; a thoroughly practical shoulder bag that can just as easily be carried as a sling bag. Conclusions For the most part, the bag is easy to use. The interior is fully adjustable. Think Tank has apparently spent considerable time rethinking their divider system, and I believe they’ve hit upon the ultimate solution. I might quibble with one or two design elements, but on the whole Think Tank Photo has taken shoulder bag design to the next level in the Signature series. Even the outer fabric is a masterful touch. In fact, when wearing the bag slung around the back, I found I could bend over and the bag seemed to grip my back without sliding around – a problem ordinarily encountered with other bags. And the zippered inner lid is yet another smart feature. In short, I like this bag so much that I look for opportunities to use it. And, again, keep in mind, it’s the perfect solution where a photo backpack may be verboten. Think Tank will have to really go out of their way to design a bag that would make me want to replace this bag. The Signature 13 is the shoulder bag I’ve been waiting for. Gladly the wait is over. |
KEY FEATURES per Think Tank Photo (with my comments in italics)
GEAR CAPACITY per Think Tank Photo (with my comments in italics)
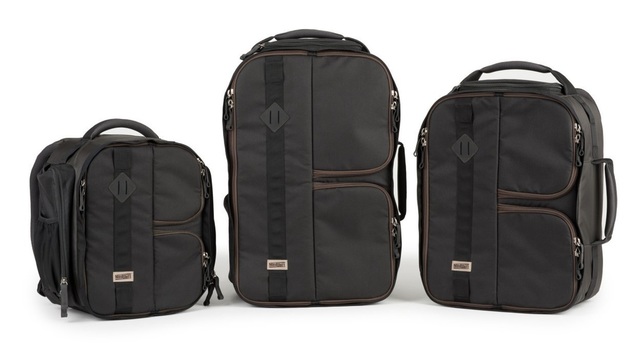
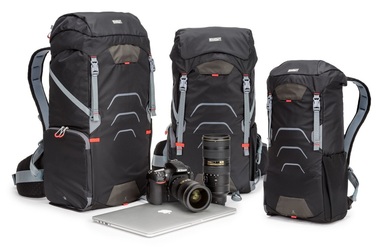
Signature 13
Signature 10
MATERIALS per Think Tank Photo
Exterior: All fabric exterior treated with durable water resistant coating while fabric underside is coated with polyurethane for superior water resistance. The bag also has 240D wool-like 195G nylon/poly blend, full-grain leather, antique-plated metal hardware, highest quality YKK RC-Fuse zippers, 550D polyspun, nylon seatbelt webbing, neoprene, 3-ply bonded nylon thread.
Interior: 210D silver-toned nylon lining, polyurethane-backed quilted Velex liner and dividers, high-density closed-cell foam dividers, 2x polyurethane coated nylon 210T seam-sealed taffeta rain cover, nylon binding, 3-ply bonded nylon thread.
PRODUCT SPECIFICATIONS per Think Tank Photo
Signature 13
Signature 10
- Modern wool-like fabric that is soft to the touch and stands-up to everyday use.
- Full-grain leather bottom and detailing, plus antique finished metal hardware.
- Zippered flap provides full closure and security to the main compartment, or tucks away when not in use.
- Dedicated laptop/tablet compartment: Signature 10 fits a 10” tablet; Signature 13 fits a 13” laptop. (In the Signature 13, you can tuck the tablet in the sleeve dedicated to the inner lid and leave the larger laptop sleeve for a thin notebook.)
- Secure clasps on front flap with one-handed operation. (Be extra careful with the metal fasteners as they may come in contact with the exposed LCD on back of the camera or with exposed glass when a lens is positioned front end up without a lens cap.)
- Dedicated phone pocket fits up to an iPhone 6s+ or S7 Edge.
- Wide handle pass-through for attaching to rolling luggage.
- Large front pocket for an extra strobe, rain cover or small book.
- Long, cushioned neoprene shoulder pad positions easily when worn cross-body (sling-style, that is).
- Zippered front pocket provides security for small items and includes a built-in organizer for pens and business cards. (There’s also a zippered sleeve on the back, where I keep the rain cover for easy access.)
- Quilted Velex dividers can be customized to fit gear.
- Shorter dividers can be made into shelves to stack short lenses. (I try to avoid stacking stuff, for easier access.)
- Dividers and bottom foam can be removed for a completely collapsible bag.
- Although the bag’s outer fabric is treated with water resistant coating, a seam-sealed rain cover is included for downpour conditions.
GEAR CAPACITY per Think Tank Photo (with my comments in italics)
Signature 13
- 1 standard-size DSLR with mid-range zoom attached plus 2–3 additional lenses. (I was able to squeeze in a D610 with Tamron 70-300mm zoom attached; a flash easily fits in the main section in a fully upright position, with room for one more lens.)
- 13” laptop fits inside a dedicated compartment
Signature 10
- 1 standard size DSLR with 3–4 prime lenses and accessories
- A complete Mirrorless camera system with 3–4 lenses and accessories
- 10” tablet fits inside a dedicated compartment
MATERIALS per Think Tank Photo
Exterior: All fabric exterior treated with durable water resistant coating while fabric underside is coated with polyurethane for superior water resistance. The bag also has 240D wool-like 195G nylon/poly blend, full-grain leather, antique-plated metal hardware, highest quality YKK RC-Fuse zippers, 550D polyspun, nylon seatbelt webbing, neoprene, 3-ply bonded nylon thread.
Interior: 210D silver-toned nylon lining, polyurethane-backed quilted Velex liner and dividers, high-density closed-cell foam dividers, 2x polyurethane coated nylon 210T seam-sealed taffeta rain cover, nylon binding, 3-ply bonded nylon thread.
PRODUCT SPECIFICATIONS per Think Tank Photo
Signature 13
- Internal Dimensions: 13.3” W x 9.1” H x 5.1” D (34 x 23 x 13 cm)
- Exterior Dimensions: 14.6” W x 10.4” H x 6.3” D (37 x 26.5 x 16 cm)
- Laptop/Tablet Compartment: 13” W x 9.1” H x 1.2” D (33 x 23 x 3 cm)
- Weight: 3.1 lbs. (1.4 kg)
Signature 10
- Internal Dimensions: 11.8” W x 7.8” H x 5.1” D (30 x 20 x 13 cm)
- Exterior Dimensions: 13” W x 9.1” H x 5.9” D (33 x 23 x 15 cm)
- Tablet Compartment: 11.4” W x 7.8” H x 0.8” D (29 x 20 x 2 cm)
- Weight: 2.8 lbs. (1.3 kg)


 RSS Feed