pixelPERFEXION™
pixelPERFEXION.net
Site contents ©2021 Jack Neubart. All rights reserved.
  • Home
  • Reviews
  • News/Views
  • About
  • Contact

Software Review: Macphun Creative Kit 2016 for Mac – A Little Creativity Goes a Long Way

7/29/2016

0 Comments

 
Picture"Wizard"
​A plug-in application fills in the gap where a host application falls short, or it gives you an easier way to do things or otherwise expands your digital editing universe.
 
Nik software was once my go-to for many effects in the plug-ins cosmos. In my workflow, plug-ins enter the picture by way of Adobe Lightroom or Photoshop, but mostly Lightroom.
 
Then, at some point in the timeline, Google decided to swallow up Nik, the way a black hole swallows up surrounding space, phased out parts of it, and bundled other parts as the Google Nik Collection. And before anyone knew it, Google took the next step and made the bundled software free. That, in my view, spelled the death knell for Nik, which, once a nova, is now a dying star. And the fact is, we are no longer seeing support in terms of updates for the software, which has begun to fade and show its age. I won’t stop using it, but, without support – meaning regular updates, a new OS (operating system) will likely herald the demise of this software sooner or later, as has happened with software apps in years past. The plug-ins cosmos is ever changing.
 
So it was time to find a viable substitute. After all, why wait till the last minute? It takes time to learn, let alone master, new software. And I wasn’t about to be caught with my proverbial pants down.

Finding a Replacement
Nik software offers something no one else does, namely, control points. And if you’ve ever sampled them, you know how delectable they are, letting you add just the right amount of flavor and texture.
 
Still, one has to move on. When you put down a favored pet, you eventually find one to replace it. It might never be the same, but over time it keeps you happy and helps you forget.
 
And I expect that will be true of Macphun’s Creative Kit. I’m not crazy about all the apps, which, again, I used strictly as plug-ins primarily in Lightroom. But they do provide enough satisfaction that I expect to keep them around and use many of them.
 
The ratings: a strong like or dislike has an exclamation point following the verdict (“Use it!”; "Skip it!"); a period denotes the app has its good and bad points, but is useful (“Use it.”); a question mark questions the efficacy of an app and indicates my ambivalence toward it, although you may find some redeeming qualities (“Use it?”)
Picture"Chewbacca"
​Creative Kit 2016 – App by App (Overall Verdict: Use It.)
My recommendation for the Creative Kit as a whole is based on the strengths of those apps that delivered consistently reliable and effectively creative results, with enough user settings that I was able to fine-tune each app as needed.
 
Each software application in the Creative Kit has “CK” added to the title, to distinguish it from the unbundled version. We’ll look at the strengths and weaknesses of each app individually.
 
I should point out one advantage to using the CK apps in standalone mode. Once you’re done with one app, you can seamlessly carry over the modified image to another app in the CK suite. That saves time and increases efficiency, creating a smoother workflow – and that’s worthy of consideration. Although, I should add that there is one flaw in this plan, as we’ll soon uncover.
 
But first let me point out that the interface from one to the next is similar, but not entirely or necessarily largely identical. It would be nice if Macphun standardized on the interface, considering all these apps have been bundled into one suite, sharing a number of features.
 
Specifically, there’s no uniformity when it comes to the location of the presets, from one app to the next across all Macphun apps. While Aurora HDR remains outside the mix of the Creative Kit, I don’t mind that it has a different look, but the same can’t be said for those apps that are part of the suite. Granted, bundling them was an apparent afterthought, but it would be nice if Macphun took the next big step to present a unified front. (I’m told some improvements are in store. However, I’m not privy to the extent of these enhancements, but would hope they’d extend to the interface.)
 
On the plus side, you can customize a preset and save it as your own preset. Each preset includes a density slider, to apply the effect at full or lesser strength.
 
Two of the apps support layers, while others support masking, except Noiseless. The masking functions are also not consistent among the Creative Kit applications, where they exist, and masks can’t be saved for future use. Worse still, if you were to use the standalone versions of these apps, the mask is not carried over from one to the next. You have to paint a fresh mask each time you plan to use one. Also, only Intensify and Tonality have fully functioning histograms, with clipping indicators and a full set of adjustment sliders.
 
When upgrading to Adobe Photoshop CC 2015.5, Adobe, in their infinite wisdom, forces you to re-install all the third-party plug-ins from scratch, which I refused to do until I was ready to upgrade to a new iMac. You can’t even import these plug-ins from another location (say an older version of the Plug-ins folder) in Preferences the way you could in the past.
 
So, long story short, my review is based largely on my experience with this set of plug-ins in Adobe Lightroom. And, while I did test the waters with the standalone apps, I prefer working in Lightroom first and foremost.
 
When working with each CK plug-in, I use the Edit in option in Lightroom (under “Photo” in the menu, or accessed via the mouse). When using Edit in with a RAW file, a new TIFF or JPEG file is first generated, so use Lightroom to make initial adjustments before generating this new file. All effects/editing in the plug-in are then applied to the newly created file, which is itself imported back into Lightroom complete with enhancements when you’re done. The original RAW file is never affected.

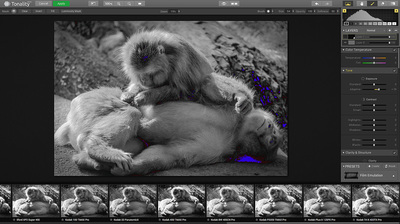
​Tonality CK. (Verdict: Use it!)
What it does: black-and-white conversion and film emulation.
 
I found this app inviting for the most part. Among the available settings are the usual suspects, namely color filters, tone curve and tonal adjustments, color temperature (yes, this affects the tonal outcome), vignetting, and split toning. You also get various structure settings to give the picture more texture and depth.
 
Two features that bring this app home for me are the Zone System display in the histogram and the ability to layer and paint effects, as well as add a graduated mask. The Zones fall a bit short at either end. Still, they do prove useful and can easily be adapted to your black-and-white workflow. The layering masks let you make adjustments locally – to selective parts of the picture, where needed. However, you can’t selectively leave the original colors in the picture, as you can with other apps.
 
The photo frames option is kind of lame and best avoided, unless and until Macphun can beef up this feature substantially. For starters, these are not frames but borders. And there’s no variability or even a realistic feel to them. A randomizing (random seed) function would be nice, with improvements as noted. By the way, if you’re looking for real frame effects, you can find them in the FX Photo Studio app, which is part of the suite.
 
To spice things up you can add a texture overlay, where you can set the blending mode and amount, using numerous textures. However, you can’t vary the pattern of the textures. Here, too, a random seed option would help immeasurably.
 
Everyone turns to a black-and-white plug-in/app for its film emulators. You may be disappointed on this score. I didn’t find the film emulators very realistic or broad enough in scope. If you want a more faithful look and more film options (especially if you’re into pushing and pulling black-and-white film), then go elsewhere. But you can overlook this failing, since I haven’t seen any film emulator convincingly imitate any film. So we can cut Tonality some slack in this area.
 
As a final note on film emulation and black-and-white conversion in this plug-in, the grain setting is adequate, although not very realistic. I would have preferred an additional setting that varies grain clumping (the Roughness setting in Lightroom). In the interim, I can simply add grain, with the precise qualities I want, after importing the image back into Lightroom.
​Intensify CK. (Verdict: Use It!)
What it does: adds structure and detail enhancements.
 
There are numerous settings for you to infuse the image with just the right amount of structure and detail, along with tonal adjustments.
 
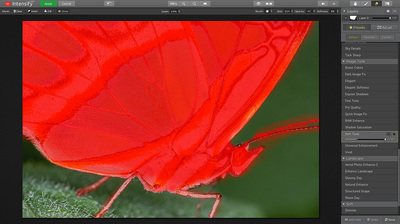
A histogram with highlight and shadow clipping heads the adjustments palette. You can also paint in the effects and add a graduated adjustment filter. What’s more, Intensify supports layers, in the sense that you can layer one effect over the other. So, for example, you can add one effect to the background layer and paint a layer mask with a second effect (in a new layer) over another part of the frame.
 
While some of you may welcome the wide array of available presets, others, such as myself, find them just a bit too much. The available adjustments let you tailor the presets to your needs, and create your own custom presets. On the plus side, you can delete presets or move them into a new folder you created, which I’d label “junk folder” (in case you change your mind later). I would also like the option to rename the presets, so I could use more descriptive names that actually tell me what a certain preset does. This would apply to all the apps in the suite.
​Focus CK. (Verdict: Use It.)
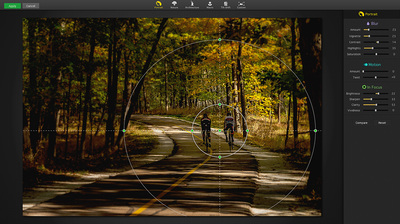
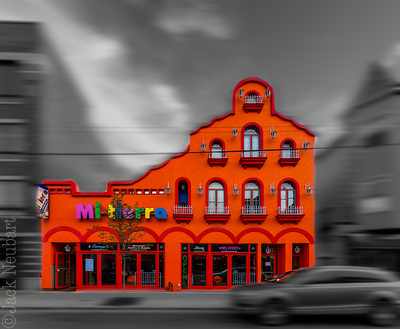
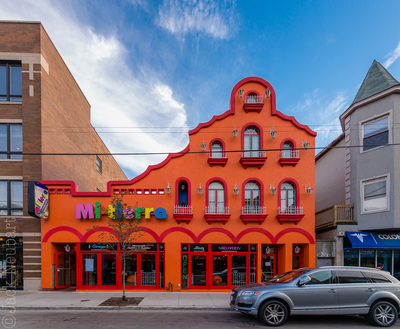
What it does: lets you selectively blur parts of the image anywhere within the frame while bringing other parts more into focus.
 
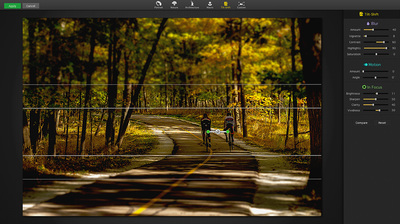
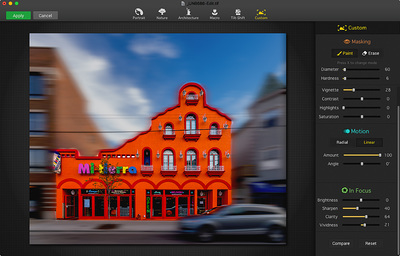
There are five presets (Portrait, Nature, Architecture, Macro, Tilt-Shift) plus Custom. Each preset presents you with options to strengthen or soften focus. The mechanisms in place give you plenty to work with. However, just to clarify, Tilt-Shift does not emulate a tilt-shift lens. In fact, it’s misleading. What it is really is, the graduated filter mask is skewed at an angle. That’s it, thereby controlling focus/blur, not depth of field. You can skew any of the masks, I should point out.
 
In Custom, you paint a mask over the areas you want to retouch. To fine-tune the mask, use low Diameter and Hardness settings, then gently push outward or inward when painting or erasing. The process is tedious, but you can get some nice results with practice. I would have liked it if the paintbrush could have been adjusted for shape as well, since a rectangular brush would have helped considerably. And the paintbrush in general needs further refinement, down to one or two pixels.
 
Focus won’t pull the proverbial rabbit out of the hat. Meaning, if it’s not sharp, this won’t fix it. But, you know those situations where something in the same plane of focus competes with your subject? Well, this will apply a graduated mask so the sharpness tapers off naturally, when done right. You do have to be vigilant that the effect is gradual, not like falling off a cliff.
​FX Photo Studio CK. (Verdict: Use it.)
What it does: enhances the image with all kinds of color and tonal variations, but also adds picture frames and quasi-kaleidoscopic effects.
 
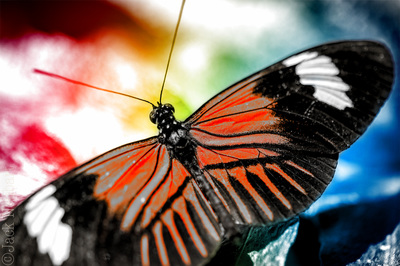
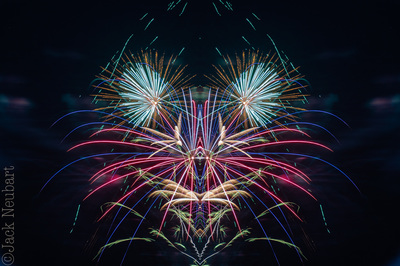
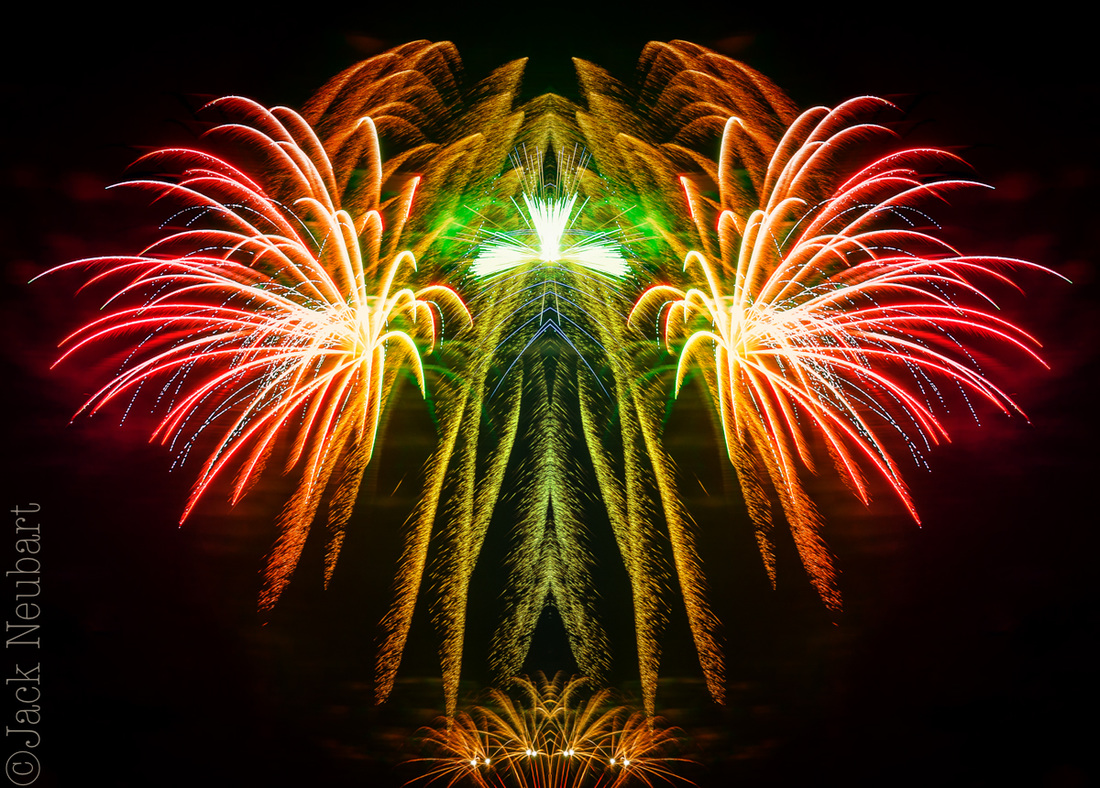
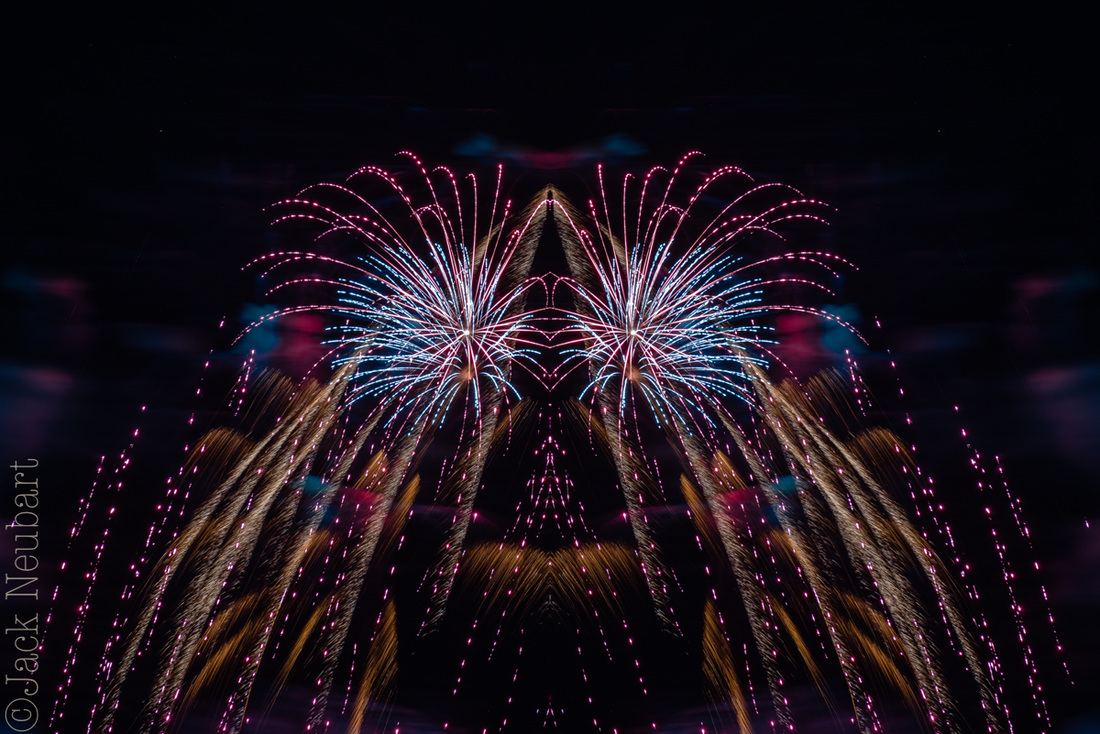
There are a number of fun effects here, many of which you’ll find, in one form or another, in Photoshop. My favorite is “Symmetry,” where the app mirrors the image in quasi-kaleidoscope fashion. As in other apps in the suite, you can edit the mask that you use to apply effects, invert it, and turn it on (applying effects to selected portions of the image) or off (applying the effect to the entire picture). Also, you can make selected adjustments to the settings used.
 
Unfortunately, you can’t edit all the parameters that you use. For instance, I might have liked to create a true kaleidoscopic image, but there are no settings that let me do that. Elsewhere, where a preset adds a vignette, you don’t have the option to modify the vignetting, even when the effect itself adds vignetting. The same applies to modifying flare ghosts and the array of colors in effects where splashes of color are added. In short, a complete palette of settings as found in Intensify would help tremendously, with additional settings for the esoteric and exotic effects added. To that add a randomizer (random seed) for utmost variability.
 
A couple of quirks that I’d uncovered, among them: (1) After making adjustments following masking, the mask clears. You can backtrack by undoing the steps and thereby restore the mask. So I recommend that you make adjustments first, mask second. (2) This app has a stability issue and has crashed on more than one occasion.
 
The bottom line? I like the app. I’d just like to see it elevated to the next level. I want not just effects I can do with Photoshop but a whole new set of effects involving fractals – to go where Photoshop can’t take you on its own, or at least not without a lot of user entanglements. And that’s especially important if I don’t step outside the Lightroom universe.
​Noiseless CK. (Verdict: Use It?)
What it does: noise removal.
Digital noise blurs detail. But, when done to excess, noise removal (NR) can blur the image even worse, to the point where the picture has a plastic toy quality. So there’s a fine line we have to tread. This plug-in has proved more effective with some images, less so for others, and in at least one instance that I tested, made things worse. It does offer some advantage over using Lightroom’s own NR filters, in that there are more ways to customize NR here. Of course, if you don’t use Lightroom, and especially if you’re shooting JPEGs, then this would be the way to go. This is often a better choice than using NR on JPEGs in camera, which later cannot be undone. Simply stated, if you’re unhappy with the results in Lightroom (or Photoshop), or if you shoot JPEGs, then try Noiseless, since you’ve already paid for it.
​Snapheal CK. (Verdict: Skip It!)
What it does: healing, cloning, and retouching tool.
This app hasn’t changed much, if at all, since it came out. I wasn’t thrilled with it then; I’m even less thrilled with it now. The process of healing and cloning is so time-consuming and laborious here that the app tries to entertain you with fun facts. The time it takes for one fun fact to flash on the screen is the time it should take to complete the process. Instead, you find yourself reading one after another after another—to the point where you just have to throw your hands up in the air and terminate the process. But when you do allow the process to finish, you’ll discover artifacts cropping up. I’ll stick to Lightroom and Photoshop when it comes to cleaning up my images. There are other problems with this app, among them a distorted histogram, which is really a bad sign.

​Capsule Comments
6 apps (standalone and plug-in); most worthwhile apps are Tonality and Intensify; FX Photo Studio is good but glitchy; Noisless is passable; skip Snapheal.

Conclusions
You can have a lot of fun with Macphun’s Creative Kit 2016. It’s not the be-all and end-all in the digital imaging world, but I found myself seriously engrossed in several of the apps, namely Tonality, Intensify, FX Photo Studio, and Focus, using them as plug-ins in Lightroom, following RAW processing.

Tonality adds Zone System steps to the histogram, making it an even more utilitarian black-and-white converter, although where film emulation was concerned, I found it wanting.

Intensify, along with Tonality, supports layers and masking, bringing the involvement level up several notches.

​FX Photo Studio also supports masking, but has stability issues that can frustrate your efforts.

Focus doesn’t really do much more than Lightroom’s graduated and radial filters do, yet I found myself taking my images in directions I hadn’t considered when working in Lightroom.

I can take or leave Noiseless. The noise removal algorithms didn’t do a convincing job.

And I wouldn’t even waste my time with Snapheal. This app hasn’t changed much, if at all, since it was first introduced, and it’s slow as the proverbial snail.
 
However, given the price of the entire suite, I’d so go for it. You’ll have fun, challenge your creativity, and will likely come away with numerous images you’d be proud to hang in your living room.

System Requirements
Mac OS 10.9 and above
iMac/MacBook Pro/ MacBook Air/Mac Pro/Mac Mini late 2009 or later
4GB RAM and more
512 MB Graphic RAM and more
Creative Kit is integrated as plugin with Lightroom 4,5,6 and CC; Photoshop Elements 10-14 (App Store version is not supported due to Apple Sandboxing); Apple Aperture 3.2 or later; Adobe Photoshop CS5, CS6 or CC 2014, СС 2015, СС.
Photos extensions support - for 10.11 only
 
Image Formats Supported
RAW (.NEF, .CR2, .DNG, .ORF etc.)
TIFF 8-bit, 16-bit
PNG
JPEG
 
Tested Platform/Hardware: 
Mac OS X 10.11 (El Capitan); 21.5” iMac equipped with a 3.1 GHz Intel Core i7 processor, 16 GB RAM, NVIDIA GeForce GT 650M 512 MB.
 
Where can I get more info?
Click here.
 
Who publishes it?
Macphun Software
 
How much is it?
$129.99 (complete suite/6 apps)

Free trial available:
Yes


0 Comments

Field Report: Moose Peterson MP-3 V2.0 Photo Backpack for Wildlife Photographers

7/24/2016

0 Comments

 
Picture
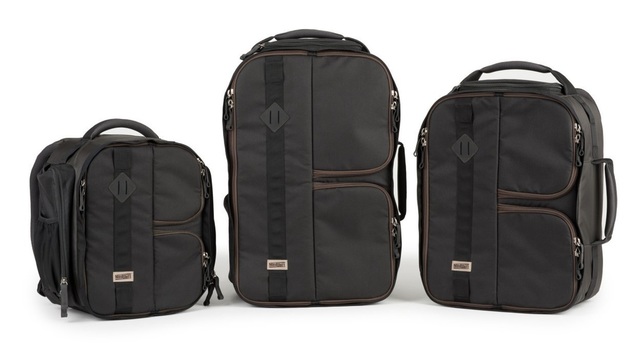
Courtesy MindShift Gear.
​The Moose Peterson MP-3 V2.0 photo backpack marks a departure for MindShift Gear in two respects. First, MindShift doesn’t normally take on camera bags designed and previously marketed by a third party. And, second, the interior is different from anything MindShift has offered before now. The first marks a prudent step toward expansion, which, in today’s world, makes economic and business sense for a forward-thinking company. The second signifies a long-awaited and highly significant step toward making MindShift products more user-friendly and utilitarian.
 
As you may have figured out, this pack is the baby of wildlife photographer Moose Peterson--for wildlife photographers. It’s a vast improvement over the original Moose Peterson pack, which I’d reviewed some years back for a major photo magazine. And it stands head-and-shoulders above a similar design from another camera bag company. In fact, even hinting at any similarity is an insult to the Moose pack.
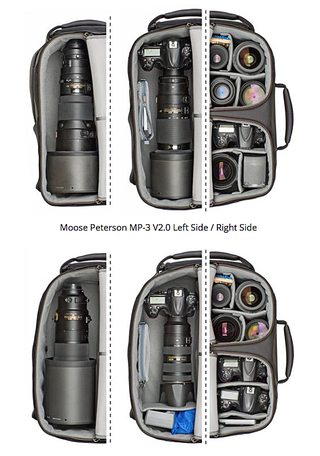
PictureJust a few of the possible layouts for a mix of gear that's ready for any eventuality. Courtesy MindShift Gear.
​An Inside Look
Professional wildlife photographers use long, fast lenses. These lenses are, by and large (no pun intended), ginormous. But many photo backpacks are not designed to easily hold them, without sacrificing much, if not all, of the available space, leaving little room for anything else.
 
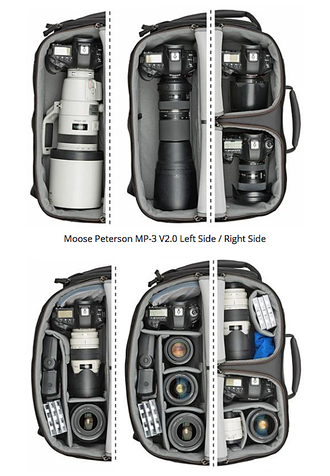
What makes this bag eminently suited to this pursuit is its tripartite design. The longest compartment is specifically designed around a long, fast lens attached to the camera or an even physically bigger lens on its own. Two smaller sections house the camera (when detached from the lens), along with a second body and even a third, several additional lenses, converters, a shoe-mount or two, and filters. When the main section is not fully occupied, there’s plenty of room for other gear. In fact, whichever size Moose pack you buy, it will comfortably hold at least one body with pro-grip, with lens attached.
 
Each item of gear is securely nestled in place thanks to the thick but flexible Velcro-friendly dividers—a serious departure from the dividers MindShift has been using in its other packs, and a welcome change. The new dividers let you customize the interior almost infinitely, with various-sized sections. The new dividers also do a better job of hugging and grabbing your stuff so it doesn’t slide around, or out of the bag, should you open it while it’s in an upright position. All this is safely contained within a fairly rigid, padded wall that encompasses the pack.
 
Protecting everything at the front end are three separate zipped access panels, which are padded. What’s noteworthy about these panels is that, rather than remaining open and exposing the contents to the elements, they drop back down. Just make sure to zip the panels shut before donning the pack. What would have made this even sweeter is if MindShift would have used the magnetic-locking clips, similar to the ones used on the Rotation packs, so the panels would stay closed. Then again, someone might see that as an encumbrance to quickly getting into the bag.

​Is It Perfect?
This pack will also hold a tripod over the large front panel or on the side, using the mesh pocket. However, I’m sure you’d rather reserve this sizable pocket for a large Nalgene water bottle. Either way, it’s a workable arrangement.
 
There’s no space for a hydration pack. In fact, as comfy as the bag is to wear, it’s best use comes from taking short hops away from your vehicle or traversing mild terrain. It’s too bulky to negotiate tight spaces. Still, I’m pretty sure you don’t plan to use this bag on long, arduous hikes over treacherous terrain or to scale steep slopes. And even if you did, feel assured that the bag will remain steadfastly on your back.
 
There’s no room for lunch, a jacket, rain poncho, first aid kit, guide books, and other hiker essentials, unless you want to clear out a section of gear. A spacious front pocket or upper tier, where stuff like this goes, is lacking. There is a small pocket on top, where you can store filters, lens tissue, and the like, plus mesh pockets inside each flap, but none of these is well-suited to a sandwich or a change of clothes.
 
The Moose pack is perfectly suited as a bag you’d want to work out of. The self-closing flaps help toward that end. When laid flat, the pack serves as the perfect workspace. And it’s designed to keep you well organized. To say that this pack is thoughtfully designed would be an understatement. 
PictureA few more possible layouts to prepare you for any situation. Courtesy MindShift Gear.
​In Use
I loaded the bag up with about 25 pounds of gear. I don’t usually carry this much gear around and dreaded the thought. Still, once I got over the shock of how heavy it felt when I first picked it up (before actually weighing the load), after donning the pack, I must say that it felt good. In fact, I’d noted that the shoulder straps didn’t slide off my shoulders. Sliding shoulder straps are a big bane on most backpacks. Still, to make carrying this load even easier, I cinched the included waist belt and sternum strap. The shoulder straps, by the way, are well padded to handle the load, as well as contoured and breathable for a comfy ride.
​
I should point out that the waist belt, while included, does not come attached to the bag. Slide it through the lumbar pad on back of the pack. You’ll note that the strap has two hook-and-loop strips. They attach to their counterpart on the inside of the lumbar pad, so make sure to insert the strap properly (the breathable mesh goes against your waist). The tapered waist strap is thin enough to be easily stored out of the way when not in use, but ample enough to give you the needed support and comfort.

You’ll note that there are no compression straps anywhere. They’re not really needed. Compression straps are required on bags designed for arduous hikes and backpacking. But to protect the zippers, at least around the circumference of the bag, there is a narrow rain flap, just wide enough to do the job, not too wide that it gets in the way.

Speaking of straps, I almost forgot to mention a few things. First, there are two padded carry handles – one on top, another on the side, so you can carry the bag like a suitcase.  While I haven’t had the opportunity to test it out, the bag’s squarish design makes it well-suited for overhead stowage on most airlines. And to further your efforts toward that end, the shoulder straps tuck neatly behind the airflow shoulder pads that lie against your back. (In fact, that’s how the bag is delivered to you.) Also, you can wrap the waist belt and secure it in front, to maintain the bag’s svelte lines.

On the face of it, this Moose pack looks like a piece of handsomely crafted luggage. In fact, the pack appears so innocuous that there’s nothing about it that even remotely screams camera bag. Well, if you don’t count the tripod hanging in front…


​Who Should Use This?
Wildlife photographers, hikers, nature enthusiasts.
 
Capsule Comments
Built tough and structurally sound; comfy; holds a lot of gear, including a long, fast lens attached to the camera; keeps gear safe and even more secure thanks to new padded divider system; three fully customizable compartments make it easy to stay on top of your gear.
 
Conclusions
This new version is a big step up from the original Moose Peterson backpack. It’s easily superior to a well-known competitor’s pack with the butterfly-wing design (based on my latest experience with that pack). And, if you’re a wildlife photographer, you shouldn’t even be thinking twice about getting this bag. Buying it should be a no-brainer.
 
I especially appreciate the new interior, which is a change of pace for MindShift. And the three separate compartments let you allocate your gear in terms of importance. Or keep one set of camera gear for wildlife in one section, another for macro in the second compartment, and a third with wide-angle lenses for landscapes—three outfits ready to go at a moment’s notice.
 
This pack will hold practically everything you need, short of snacks and a rain poncho. But the photographer’s vest you’ll likely be wearing will take care of that. Okay, this pack won’t hold a laptop or even a tablet, but how important is that? And if you’re overnighting, chances are you’re carrying more bags besides your camera gear, so don’t make the tablet or laptop the deciding factor. Consider the Moose Peterson backpack as a long-term investment and you won’t go wrong.
Manufacturer (ordering info):
MindShift Gear
​KEY FEATURES (per MindShift Gear)
  • Original 1998 ‘Moose Ears’ design with auto-close compartment flaps protect the interior from dust, spray, wind, etc.
  • Three-compartment system allows you to keep lenses attached providing the quickest way to access gear
  • Tuck-away harness system with removable waist belt easily allows you to streamline your bag when loading it in a train, plane, or automobile (MP-1 & MP-3 only)
  • Sized for carry-on, allowing you to get the maximum amount of gear on the plane
  • Long glass carrying solution with body attached
  • Tripod/monopod mounting system on side and front
  • Flap guard protects front zippers
  • Highest quality RC Fuse YKK zippers, 600D and 420D nylon construction for long-lasting durability and strength
  • Dual-density foam padded shoulder harness, cushioned with air mesh
  • Zippered side pockets fit full-sized flashes (MP-7 only)
  • Stretch water bottle pocket fits 32 oz. water bottle
  • Robust zipper pulls are easily gripped with or without gloves
  • Seam-sealed rain cover/drop cloth included protects against rain and dust


GEAR CAPACITY (Mfr. specifications)
 
Moose Peterson MP-3 V2.0 (tested)
  • 3 gripped DSLRs with lenses attached, 1–2 additional lenses and 1–2 flashes and accessories
  • Or, 3 gripped bodies and 1 ungripped body detached from lenses, 4–5 standard zoom lenses, 1–2 flashes, a 2x teleconverter and accessories
  • Maximum lens size: Holds 600mm f/4 detached or 500mm f/4 lens attached to a gripped body
 
Moose Peterson MP-1 V2.0
  • 3 gripped DSLRs with lenses attached,3–5 additional lenses, 2x teleconverter,1–2 flashes and accessories
  • Or, 3 gripped bodies and 1 ungripped body detached from lenses, 7–8 standard zoom lenses, 1–2 flashes, a 2x teleconverter and accessories
  • Maximum lens size: Holds 800mm detached
 
Moose Peterson MP-7 V2.0
  • Holds 1 gripped body attached to 70–200mm f/2.8 and two ungripped bodies with primes attached, two flashes and accessories
  • Or, holds 1 gripped body and one ungripped body with 70–200mm f/2.8, 24–70mm f/2.8, 14–24mm f/2.8 (or 16–35mm f/2.8), a 2x teleconverter, two flashes and accessories
  • Maximum lens size: 200mm f/2 attached to a gripped body
MANUFACTURER SPECIFICATIONS
 
Moose Peterson MP-3 V2.0 (tested)
  • External Dimensions: 14” W x 20” H x 8” D (35.5 x 50.8 x 20.3 c m)
  • Large Camera Compartment: 6.8” W x 18” H x 6.8” D (17.3 x 46 x 17.3 cm)
  • Small Camera Compartments (each): 6” W x 8.5” H x 6.8” D (15 x 21.5 x 17.3 cm)
  • Weight: 3.2–4.6 lbs. (1.5–2.1 kg) (Lower weight excludes all dividers and accessories)
 
Moose Peterson MP-1 V2.0
  • External Dimensions: 14” W x 23” H x 8” D (35.5 x 58.4 x 20.3 c m)
  • Large Camera Compartment: 6.8” W x 21.8” H x 6.8” D (17.3 x 55. 4 x 17.3 cm)
  • Small Camera Compartments (each): 6” W x 10” H x 6.75” D (15 x 25 x 17 cm)
  • Weight: 3.7–5.1 lbs. (1.7–2.3 kg) (Lower weight excludes all dividers and accessories)
 
Moose Peterson MP-7 V2.0
  • External Dimensions: 15” W x 15.5” H x 8” D (38.1 x 39.4 x 20.3 cm)
  • Large Camera Compartment: 5.3” W x 14” H x 6.5” D (13.5 x 35.5 x 16.5 cm)
  • Small Camera Compartments (each): 5” W x 6.3” H x 6.5” D (12.5 x 16 x 16.5 cm)
  • Weight: 2.5–3.3 lbs. (1.1–1.5 kg) (Lower weight excludes all dividers and accessories)

​MATERIALS​ (Mfr. specifications)
Exterior: For superior water resistance, all exterior fabric has a durable water-repellant coating, plus the underside of the fabric has a polyurethane coating. The bag also features highest-quality abrasion-resistant YKK® RC-Fuse zippers, 420D velocity nylon, 600D polyester, 1680D ballistic nylon, 320G DuraStretch mesh, nylon webbing, 350G airmesh, nylon webbing, 3-ply bonded nylon thread.
 
Interior: High-density velex, 210D silver-toned nylon lining, hexa mesh pockets, high-density closed-cell foam, 3-ply bonded nylon thread.
0 Comments

Field Report: MindShift Gear’s Multi-Mount Holster 50 – When a Regular Shoulder Bag Just Won’t Do

7/14/2016

0 Comments

 
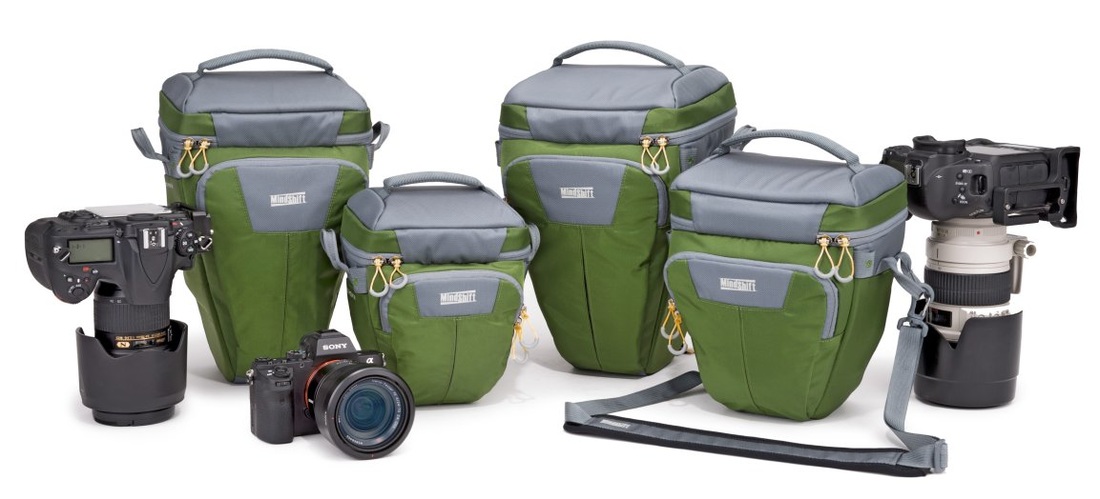
PictureMindShift Gear's Multi-Mount Holster collection. Courtesy MindShift Gear.
​I can’t remember ever using a camera holster. Fact of the matter is, I find them too limiting. More to the point, I’m a photo backpack guy.

Still, I was intrigued by the moniker Multi-Mount, so I opted to test out this new bag from MindShift Gear, one of my two favorite camera bag companies (along with Think Tank Photo).

I chose to review the largest holster in this new lineup, the Multi-Mount Holster 50. And when the bag arrived and I initially holstered my Nikon D610, my first thought was: big mistake. What was I thinking? This bag is too roomy for a camera without a pro-grip. I should have ordered this bag one or two sizes smaller.

So I let it sit around, and sit, and sit.

Until one day, when I was retrofitting a backpack to give to a friend.

​Unlike some reviewers, I recycle my older camera bags. I even ask that the bag recipients make a small charitable contribution in place of paying me for the bag.

Anyway, I came upon a padded divider that I’d stored. That’s another thing I do. Some packs—not any from MindShift or Think Tank, I might add—are just not worth giving to anyone, so I gut them and keep the dividers for later use, relegating these bags to other purposes, or just leaving them in the laundry room for any takers.

​Retrofitted to Suit My Needs
So, here was this wedge-shaped divider that turned out to be a perfect fit for the Multi-Mount 50. Well, almost perfect. To make this an even better fit, I added a thick pad covered in Velcro-friendly material to the bottom of the holster. Which now meant I could secure the divider on three sides using its hook-and-loop tabs. (And, yes, that pad came from yet another old pack.)
 
I wasn’t done. The holster included two narrow, thinly padded dividers. I don’t even recall where they were placed initially, but the first thing I did was to pull them out. It turned out that the wedge-shaped divider fell a bit short, leaving the top of the camera with the pentaprism housing exposed to bumps from anything sitting in the newly partitioned adjoining section. So I simply used these spare dividers to add to the height of the barrier. The arrangement was flexible enough to accommodate the top of the camera while isolating the two sections.
 
Granted, I probably could have used the two spare dividers alone, without adding anything, but the divider that I did add was thicker and of a heavier density and I felt it would do a better job of separating one section from the other.
 
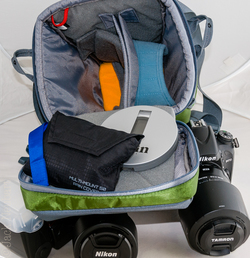
Now I had room for my Nikon SB-700 flash in the ancillary section, with the D610 and attached Tamron 70-300mm zoom (or Tamron 24-70mm f/2.8 zoom) in the main, larger section. Could I do even better? (Note: the manufacturer recommends using the outside pocket for the flash, but I prefer keeping my flash where it would be better protected while on the move, then possibly sticking it in a photo vest pocket once I arrive at my destination.)
PictureMulti-Mount Holster 50 customized to hold a DSLR with attached lens, a second lens, flash, rain cover, and filter, as well as additional items in the outside pocket. ©Jack Neubart. All rights reserved.
​Room for More
One day I’d decided to do some macro shooting, replacing the zoom with my Tamron 90mm f/2.8 macro. That meant I’d also need my Metz ring flash. Hmm, could I also make room for the SB-700 inside the bag?
 
Why bother with the SB-700? I’ve often used a shoe-mount in place of the macro flash. The trick is to use the flash in bounce mode with the dome diffuser (diffusion dome) attached. That produces a soft, feathered light that doesn’t overwhelm the subject or create heavy, disturbing shadows behind it.
 
Anyway, that step was simple enough. I added a layer of protection (another padded divider from the storage bin) over the ring flash and lay the shoe-mount on top.
 
Next I wondered if I could make room for a second lens. Okay, something would have to give. I removed the ring flash. After all, the shoe-mount had greater utility. The Tamron macro was still on the camera, but I also wanted to take my Nikon 60mm macro, and as luck would have it, this lens was compact enough to fit in place of the ring flash, with the shoe-mount again riding on top.
 
And There Was Room for Even More
There is a zippered inside pocket—mesh so you can see what’s inside. I stuck the rain cover and a filter (inside its case) in there.
 
I wasn’t done. I had an outside front pocket waiting to be filled. This space was relegated to anything that wasn’t easily damaged, which included batteries for the camera and flash, a white balance target, and Rocket blower.
 
I was a happy camper.

​In Use
First, you’re probably asking, how easy was it to get at the camera, now that I’d crowded it in with all the extras? Very easy indeed.
 
I should point out that I’d attached a SpiderPro Hand Strap to the camera, with a BlackRapid Tripod Plate 70 at the bottom, which now lets me readily use a tripod when needed.
 
While the bag would have accommodated a neck strap on the camera, a sling that attaches to the tripod socket would have been a bit much for this configuration. I would have had to make room, at the expense of the second section.
 
The nice thing about this Spider wrist strap is that I’ve gotten so used to it that I no longer feel a need to hang the camera around my neck or deal with a long strap getting in my way.
 
Wonder how I manage to hold onto the camera with that wrist strap for long periods without a neck strap or sling? Intermittently I rest the camera in my free hand, relax my grip for a moment or two, and flex my fingers. Simple, really.
 
The holster comes with a waist belt. That made a big difference, securing the bag in place so it wouldn’t swing around as I bent over to shoot low when focusing on macro subjects. That meant that I wouldn’t constantly have to divert attention away from the subject and toward the bag in an effort to reposition the holster behind my back, where I generally like to keep it, rather than at my side. (Okay, it did slide around a little, since I don’t like to cinch the waist belt too tight, but it wasn’t enough to prove an annoyance as I was shooting.)
 
The waist belt also takes some of the weight off your shoulder. However, it didn’t go far enough. Because I’d weighed the bag down by filling it to capacity, I found myself having to swap out the shoulder strap for one with a more substantial all-rubber shoulder pad, which also did a better job of gripping my shoulder. (Again, another remnant from a bag relegated to the throw-away pile.)
 
That said, the shoulder pad on the shoulder strap that came with the bag is pliable enough so that it won’t dig into your neck when you wear it sling-style, if that’ how you prefer to wear a shoulder bag. The strap would also work well if you opted to wear the bag as a chest pack, with the strap draped around your neck. This holster bulked out too much for me to comfortably wear it in this fashion. That’s something I might have done with one of the smaller versions.
 
I didn’t even try the other carrying modes. Again, if this were one of the smaller holsters, I would have entertained the notion of attaching it to my backpack. The bag also comes with a pair of tether straps that let you secure the holster to the back of the backpack; in front, as a chest pack but this time in tandem with the backpack; and as a waist pack, attached to the waist belt of the backpack, albeit at the front, lower down than you’d normally wear a chest pack. By letting the Multi-Mount ride tandem with a backpack, you can keep the camera in the holster, at your beck and call, while the rest of your gear rides comfortably on your back.
 
What can I say? The Multi-Mount Holster gives you the best of all worlds, keeping gear safe and ready for use the moment inspiration strikes. I didn’t think I’d like it, but I do. I use it regularly. And now I’m glad I’ve got the Multi-Mount Holster 50, the biggest holster in the lineup, since it lets me carry enough gear to tackle whatever I expect to encounter during the day, or night.

Capsule Comments
Uncompromising quality and craftsmanship; lightweight; highly durable; multi-use: carry it alone or attached to any backpack; the largest bag in the lineup, the Multi-Mount Holster 50, carries enough gear to cover a wide range of situations.
 
Conclusions
I managed to pack a Nikon D610 with attached lens, a Nikon SB-700, and either a ring flash or extra lens in this bag after I retrofitted it to my needs. As is, it will easily fit a pro camera with a pro-grip and lens attached, and some extras.
 
This Multi-Mount Holster has become a replacement for my UltraLight Dual when I want to be really light on my feet. I did swap out the shoulder strap for one with a more robust shoulder pad, and, once I did that, I found myself wearing this holster for hours on end. The included waist belt was especially welcome, making the bag so much more comfortable and secure, no matter how much I moved around. You might want to consider the Multi-Mount 30 or 20 (one or two sizes smaller) for a DSLR without a pro-grip, for a snug fit without reconfiguring the bad as I did.
 
In the final analysis, from my experience, the Multi-Mount Holster is a better, more practical choice than a shoulder bag. And it’s a compact alternative to my photo backpacks.
 
On a long hike, I’d definitely consider one of the smaller Multi-Mounts attached to my backpack. No matter how thoughtfully designed the pack, nothing beats having a camera immediately at hand in one of these holsters.

Who Should Use This?
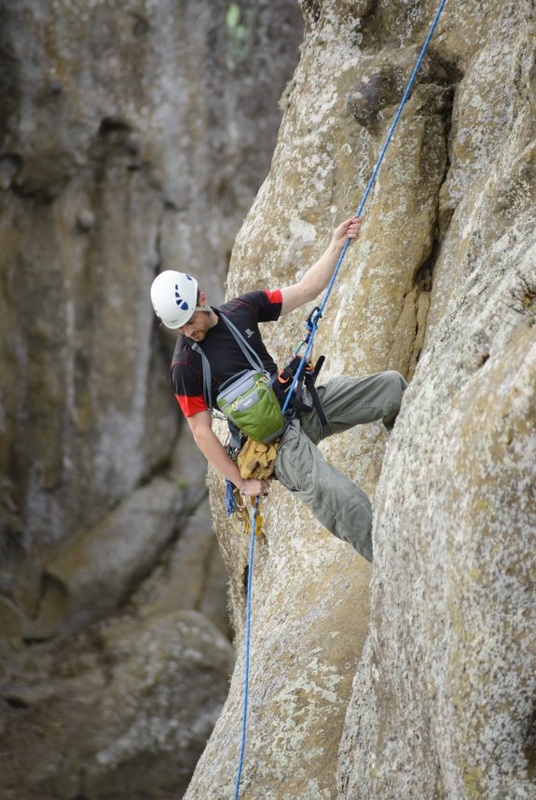
Travel photographers who like to travel light, hikers, nature enthusiasts, mountain climbers, rock climbers.
Picture
Multi-Mount Holster climbing to new heights. Courtesy MindShift Gear.


FEATURES AND BENEFITS (Mfr. specifications)
  • Designed for today’s DSLRs with attached quick release or L-bracket
  • Integrated multi-mount adjustable strap system tucks away into three dedicated pockets
  • Weight bearing shoulder strap features stretch-free neoprene comfort, slip-resistant shoulder pad, lightweight clips, and two-sided length adjustment including one ladderlock
  • Front harness weight-bearing pack mount straps feature quick-release SR buckles for instant removal and pivoting lightweight clips that attach to any pack’s shoulder harness with daisy chain webbing
  • Lightweight and compact stabilizer waist belt is designed to easily pivot the shoulder bag configuration around over the webbing
  • Stabilizer straps, stored in tuck-away pockets, quickly wrap around any backpack shoulder strap and create triangulated stabilization from low and high points on the front end of the bag
  • New YKK zippers are coated with an anti-corrosion substrate, providing enamel-finish durability. These zippers are less prone to freezing and much lighter than standard slides. They also pass YKK’s industry-renowned production fastening standard with a static pull test at three angles result in smoother zipping in all conditions.
  • Exterior shell is constructed with 420D nylon with Durable Water Resistance finish for long lasting durability and strength
  • Front expandable pocket includes organizer pocket, two separate loops for memory card holder and keys, and double sliders
  • Domed top creates room for attached camera strap storage
  • Comfortable air mesh back panel includes stabilizer waist belt pass-through
  • Internal zippered lid pocket for added protection from the elements
  • Removable LCD screen protector and adjustable divider(s) for different lens configurations
  • Main compartment security loop secures camera to lanyard in exposed environments
  • Top grab handle
  • Ergonomic zipper pulls are easily gripped with gloves
  • Shoulder strap loops double as clip-in point for water bottles, etc.

​MATERIALS (Mfr. specifications)
Exterior: For superior water resistance, all exterior fabric has a durable water-repellant coating, plus the underside of the fabric has a polyurethane coating. The holsters also feature high-quality YKK zippers, 420D high-density nylon, 420D velocity nylon, 320G, 350G airmesh, nylon webbing, 3-ply bonded nylon thread.
Interior: 200D poly, velex, high-density closed-cell foam, belly-o mesh, 3-ply bonded nylon thread.

​
Where can I get more info?
MindShift Multi-Mount Holster collection

Manufacturer (ordering info):
MindShift Gear
 
How much is it?
$119.99/Multi-Mount Holster 50 (product reviewed)
GEAR CAPACITY (Mfr. specifications)
Multi-Mount Holster 50
  • Holds one gripped Pro DSLR (Nikon D3/D4 series or Canon 1D/1Ds/1DX series) and one standard zoom lens
  • Holds one standard DSLR with L-bracket (Nikon D800/D700) and one standard zoom lens
  • 24-70mm f/2.8 with hood extended (Canon or Nikon); 70-200mm f/2.8 with hood reversed (Canon or Nikon); 300mm f/4 with hood reversed (Canon or Nikon); 80-400mm f/4 AF-S/G with hood reversed (Nikon)
  • Front pocket holds SB-910 (Nikon Speedlight); 600 RT (Canon Speedlite)
 
Multi-Mount Holster 30
  • Holds one standard-size DSLR (5DM3 or D810) and one standard zoom lens
  • Holds one gripped DSLR (1Dx or D4s) and one standard zoom lens
  • 24-70mm f/2.8 with hood extended (Canon or Nikon); 70-200mm f/2.8 with hood reversed (Canon or Nikon); 300mm f/4 with hood reversed (Canon or Nikon); 80-400mm f/4 AF-S/G with hood reversed (Nikon)
  • Front pocket holds SB-910 (Nikon Speedlight); 600 RT (Canon Speedlite)
 
Multi-Mount Holster 20
  • Holds one standard-size DSLR (5DM3 or D810) and one standard zoom lens or two primes
  • Holds one large (un-gripped) Mirrorless body and one standard zoom lens or two primes
  • 16-35mm f/2.8 with hood extended (Canon); 16-35mm f/4 VR with hood extended (Nikon); 24-70mm f/2.8 with hood reversed (Canon or Nikon); 17-55mm f/2.8 with hood reversed (Canon or Nikon)
 
Multi-Mount Holster 10
  • Holds one large (un-gripped) Mirrorless body and one standard zoom lens or prime
  • Holds one compact DSLR (Rebel, 3300 or 5300 series) and one lens
  • Compatible Lenses:  Prime lens; Kit Lens; 16-85mm (Canon or Nikon) with hood reversed; 16-35mm f/2.8 (Sony)

​MANUFACTURER SPECIFICATIONS
 
Multi-Mount Holster 50 (tested)
External Dimensions: 13.25” H x 8.5” W x 8.75” D
Camera Compartment: 11.25” H x 7.25” W x 6.5” D
Weight: 14.875 oz.  (Weight w/ all straps and rain cover: 1 lb. 7.625 oz.)
 
Multi-Mount Holster 30
External Dimensions: 13.25” H x 8.5” W x 6.5” D
Camera Compartment: 11.25” H x 7.25” W x 4.5” D
Weight: 12.875 oz.  (Weight w/ all straps and rain cover: 1 lb. 5.25 oz.)
 
Multi-Mount Holster 20
External Dimensions: 9.5” H x 8.25” W x 6.5” D
Camera Compartment: 7.5” H x 7.25” W x 4.5” D
Weight: 11.625 oz.  (Weight w/ all straps and rain cover:  1 lb. 3.5 oz.)
 
Multi-Mount Holster 10
External Dimensions: 8.5” H x 7.25” W x 6.25” D
Camera Compartment: 6.75” H x 6” W x 3.75” D
Weight:  10 oz.  (Weight w/ all straps and rain cover:  1 lb. 2.125 oz.)


Picture
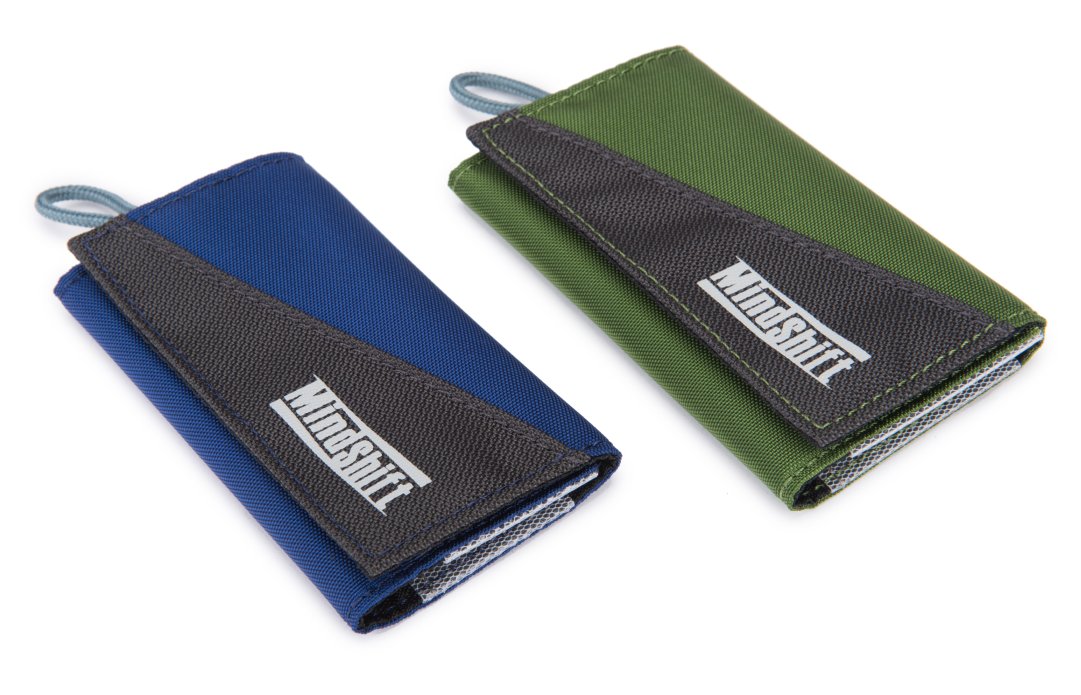
MindShift Gear Card-Again memory card wallets. Courtesy MindShift Gear.
A NEAT ACCESSORY
Keep memory cards at the ready with MindShift Gear’s Card-Again memory card wallets. The CF version holds 4 cards; the SD version holds 6. If you get the CF version, as I did, you can store 2 SD cards in each slot.

0 Comments

    Reviews

    TECHNICAL EDITOR
    Jack Neubart


    Archives

    December 2019
    September 2019
    August 2019
    July 2019
    May 2019
    April 2019
    February 2019
    November 2018
    September 2018
    August 2018
    May 2018
    January 2018
    November 2017
    September 2017
    July 2017
    June 2017
    May 2017
    April 2017
    February 2017
    December 2016
    November 2016
    October 2016
    August 2016
    July 2016
    May 2016
    April 2016
    March 2016
    February 2016
    January 2016
    December 2015
    August 2015
    December 2014
    August 2014
    July 2014
    April 2014
    November 2013
    October 2013

    Categories

    All
    13x19-inch Printers
    35mm-style Digital Cameras
    Acratech
    Adobe Software
    Austin
    Backpacks
    Ballheads
    Camera Backpacks
    Camera Bags
    Camera Cases
    Camera Holsters
    Camera Luggage
    Camera Supports
    Canon Cameras
    Canon Lenses
    Compact DSLRs
    Compact Photo Printer
    Compact System Cameras
    Desktop Printers
    Digital Projectors
    Digital Retouching
    Digital SLR
    DSLR
    Epson
    Exposure Control
    Fashionable Bags
    Fast Lenses
    Film Emulation
    Flash Photography
    Hawaii
    HDR Plug-in
    HDR Software
    HD SLR
    HD-SLR
    High-resolution DSLR
    Holster Bags
    Image-editing Software
    Image-stabilized Lenses
    Inkjet Printers
    L Bracket
    L-bracket
    Lens Cases
    Lenses
    Lens Pouches
    Leveling Base
    Long-lens Bags
    Macphun
    Macro
    Macro Flash
    Manfrotto
    Mega-zoom Digital Camera
    MindShift Gear
    Mirrorless Cameras
    Nikon Cameras
    Nikon Digital Cameras
    Nikon Mirrorless
    Nikon Pro Digital Cameras
    Nissin
    Nodal Rail
    Nodal Slide
    Olympus
    Outdoor Photography
    Panorama Head
    Panoramas
    Panoramic Photography
    Photo Accessories
    Photo Backpacks
    Photo Belts
    Photo Luggage
    Photo Rollers
    Plug-ins
    Point-and-shoot Zoom
    Portrait Retouching Software
    Printer
    Pro Cameras
    Pro Digital Cameras
    Radio Remote Flash
    Radio TTL Wireless Flash
    Rain Covers
    Rain Hoods
    RAW Conversion Software
    Review: Photo Accessories
    Review: Phottix Odin Radio Remote
    Review: PocketWizard ControlTL
    Review: Software
    Ring Flash
    Rolling Cases
    Samsung Cameras
    Shimoda Designs
    Shoe Mount Flash
    Shoulder Bags
    Shutterbug.com Review
    Shutterbug Magazine
    Sigma Lenses
    SKB Cases
    Sling Bag
    Sling Bags
    Sling Pack
    Snapshot Printer
    Software
    Software Effects
    Super Wide Lenses
    Super-wide Lenses
    Superzoom
    Tamron Lenses
    Telephoto Zooms
    Tenba
    Texas
    Think Tank Photo
    Tripod Heads
    Tripods: Carbon Fiber
    TTL Radio Wireless Flash
    TTL Wireless Flash
    Ultra Wide Lenses
    Ultra-wide Lenses
    Ultra-zoom Digital Camera
    Wide Format Printers
    Wireless Flash
    Zoom Lenses

    RSS Feed

    All products and services are the trademarks or registered trademarks of their respective owners.
    Use or mention of any product or service is not an endorsement - compensated or otherwise.
    However, manufacturers, distributors, vendors & services may provide products or services for use.

    Your purchase and/or use of any product or service tested, reviewed, listed or mentioned is solely at your discretion and you release us from any and all liability associated with such purchase and/or use.

Your satisfaction, our expertise. They go hand in hand.
Bringing over 35 years' experience into everything we create.

Entire contents of this website is comprised of original works created by Jack Neubart, including but not limited to photographs, digital work, musical compositions, stories, humor, poetry, and any other artistic or textual material. 
All work Copyright ©2021 Jack Neubart and is protected under United States and International laws and treaties.
All rights reserved. None of the contents may be copied, extracted, abstracted, adapted, transmitted, digitally altered, or otherwise used or published without express permission of the Copyright owner.
Webmaster: Jack Neubart (building on a Weebly.com template).