pixelPERFEXION™
pixelPERFEXION.net
Site contents ©2021 Jack Neubart. All rights reserved.
  • Home
  • Reviews
  • News/Views
  • About
  • Contact

Test Report: Tamron 150-600mm Di VC USD G2 (Model A022)

7/26/2017

4 Comments

 
Picture
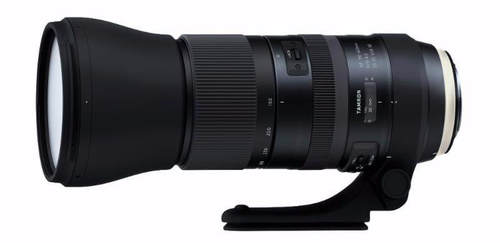
Tamron SP 150-600mm f/5-6.3 Di VC USD G2 (Model A022). Courtesy Tamron USA.
​This is how I ended up buying, and testing, the Tamron 150-600mm G2 lens.
 
My interest in bird photography took a decided turn earlier this year. Over the past few years, I’d been photographing deer, mostly with a Tamron 70-300mm on my Nikon D610. However, aside from the occasional waterfowl, birds were largely out of the question. Then I wrote a column for Shutterbug Magazine on the amazingly talented bird photographer Alan Murphy and I’d found the impetus I needed. 
 
Alan’s bird photography is largely reminiscent of the paintings of John James Audubon. His images have this clean, uncluttered look, with a unique depth to them. I could only hope to achieve a modicum of his success. Anyway, you really should check out Alan Murphy's bird artistry on his website.
 
Alan conducts workshops on bird photography, and I had asked him what lens focal length he recommends to workshop attendees. He answered, 600mm. Numerous factors come into play that may affect that choice (species, time of day, situation, for example), but that 600mm is normally the go-to workshop lens for many scenarios.
 
And that got me thinking. My longest focal length until recently was 300mm (in a 70-300mm zoom for my Nikons, as well as a Canon 300mm f/4 fixed-focal lens when I was shooting Canon). Not nearly enough for those birds I wanted to photograph. Even attached to my Nikon D300, that only gave me 450mm – respectable reach, but not ideal, keeping in mind that birds in the wild keep a buffer zone between you and them – and that buffer zone translates to: I need a longer lens!
 
So I explored my options, namely, the cost of a long lens, its size and weight, and how I’d primarily be using it. I usually shoot handheld with most lenses, and largely by available light, resorting to flash only occasionally. When I’d finished crunching the numbers, the choice was obvious.
 
I bought the Tamron 150-600mm G2.
 
Poor AF with fast-moving subjects on the cameras I then owned, namely the Nikon D610 and D300, also meant I needed to update to a more responsive DSLR, and one that could easily work with the maximum f/6.3 aperture on this Tamron zoom. That soon resulted in the purchase of the Nikon D500 (look for a test report on this camera soon). Attached to a DX camera - specifically the D500 (APS-C format with a cropped sensor factor of 1.5x), this lens would give me 900mm out of the gate, and 1170mm when I applied the additional in-camera 1.3x crop factor without adding any converters. That gave me considerable reach, although I’d discover that capturing flighty subjects at nearly 1200mm would prove to be largely a frustrating task.


The Tamron 150-600mm G2: Overall
This lens picks up where the original Tamron 150-600 (introduced December 2013) leaves off. According to Tamron, the new version (G2 = second generation) adds better optical and AF performance, image stabilization enhancements, fluorine coating, and a Flex Zoom Lock, with optional matched teleconverters.
 
While I only checked it out once and have yet to actually use it (haven't found a need for it), the Flex Zoom Lock lets you lock in any zoom setting with the aid of a clutch-type mechanism. And it works easily enough. There is, of course, the more traditional zoom lock at the minimum zoom setting, although I didn’t experience any lens creep with the lens left in a ready (unlocked) state.


How much is it?
$1399 (Canon/Nikon/Sony A mount)
 
Distributor/manufacturer
Tamron USA

More Info:
Tamron 150-600mm G2
​
A Note About the TAP-in Console
This accessory lets you update the lens's firmware and customize the lens. I bought it but haven't found a need for it yet. There were no firmware updates at this time. The link is obscure, so here it is, for your convenience: TAP-IN CONSOLE.
​The Tamron 150-600mm G2: Optics
Optically the lens features low-dispersion glass to deliver crisp images, with proprietary coatings to counter flare and ghosting. Whereas both old and new versions of this lens feature moisture-resistant construction, only the new G2 can boast fluorine coating.
 
While not new in a Tamron lens, and certainly not exclusive to Tamron, fluorine coating, according to the company, makes the lens surface “easier to wipe clean and less vulnerable to the damaging effects of dirt, dust, moisture, and fingerprints.” I try desperately to avoid anything coming in contact with the surfaces of my lenses, so thankfully I didn't have to test for this feature.
 
The one question I have for Tamron is: Why fluorine-coat only the front element? Why not also the rear element? A lens can easily get smudged at either end. (A question I’ve asked before with regard to Tamron’s 15-30mm f/2.8.)
 
Tamron also improved close-focusing on this lens. The original 150-600 focused down to just over 106 inches for a 1:5 reproduction ratio. The new G2 version takes that down to under 87 inches (1:3.9), which is a considerable difference that you may not fully appreciate just from the numbers. Not a true macro lens, but very respectable – and it would prove to come in handy. I managed to capture some fairly tight shots simply by zooming all the way out to the 600mm setting and bringing the lens in as close as possible.

​Adding a Matched Converter
This Tamron lens does have the option of a matched converter. The available converters are 1.4x (TC-X14) and 2x (TC-X20). Keep in mind that adding a converter effectively slows down the lens, by one and two stops, respectively, leading to slower AF response times.
 
I held off adding the converter because I was buying the D500 primarily for its AF responsiveness and didn’t want to hamper the camera in any way. One day I might yet entertain buying the Tamron converter. But not today.
 
In combination with the 1.5x and 1.3x crop factors built into the D500, a 1.4x converter would take this lens to over 1600mm. On top of that crop factor combo, the 2x converter would effectively give me a 2340mm lens. Either would also require a bright, sunny day and birds that remained fairly stationary for less than optimum shutter speeds or which I could photograph in flight, while I panned with the camera. And don’t get me started on handholding limitations. Suffice to say, a sturdy tripod with a  gimbal head would be a practical addition to your field outfit at this point.
 
While this lens does employ Tamron’s proprietary Vibration Compensation (VC) technology, image stabilization only takes a lens so far. Although, it often comes to the fore in situations where neither a tripod nor monopod is a practical solution.

In Use: Handholding the Tamron 150-600mm G2
I own a Canon 300mm f/4 IS lens. I used to complain about handholding that lens. No more. This Tamron lens makes that one feel like a featherweight. Okay, I exaggerate. Still, the Tamron is about 2 lb. heavier, and when held for long periods, that literally begins to weigh on you.
 
I’ve taken to doing curls with a 10-lb. dumbbell to build up endurance and resistance in my left arm, the one supporting the lens – and I’m happy to say, it’s worked, though I don’t feel I’m quite there yet. Still, I’ve been able to reduce shutter speeds at maximum focal length and still achieve sharp results.
 
After all that handholding, I’d decided to make things easy for myself and bring a monopod into the picture. What a difference that made! Granted, it slows me down somewhat and now I have to be careful when moving about, unless I collapse the leg or, better yet, detach the monopod from the camera entirely – two steps guaranteed to slow me down further.

​In Use: Image Stabilization
The lens offers three VC (Vibration Compensation) image stabilization modes. Mode 1 stabilizes the image when the shutter is released, but also maintains a stable viewfinder image while the shutter button is pressed halfway, or the AF button is activated. Mode 2 is used when panning. And Mode 3 foregoes the stable viewfinder image to deliver more certain stabilization of the image (which means, you’ll have to hold really steady to keep critical areas in focus). FYI – according to the official number crunchers, Tamron’s VC will deliver 4.5 stops of optimized shutter speed performance against camera shake when set to Mode 3.
 
In practice, I largely kept the lens in Mode 1. If you have trouble holding the lens steady, your compositions and focusing may be thrown off in Mode 3. Mode 1 at least gives me a good shot at controlling both.

One thing I’ve discovered is that I do much better getting sharp shots with the lens tilted downward to some degree, rather than straight on or upward. Apparently, there’s less tension exerted on the supporting arm this way. I did manage to get a camera-shake-free picture of a flower with the lens at 600mm (= 900mm/full frame) at 1/60 second, which translates to roughly a 4-stop gain for a handheld exposure – in Mode 3. The optimum for a handheld exposure at this focal length would be 1/1000 second.
 
When I was testing the Tamron 70-300mm some years back, I was able to go 5 stops slower than the recommended shutter speed to prevent camera shake, though not consistently. I really don’t like to rely on any image stabilization technology if I can avoid it, but I will resort to it in a crunch. When shooting with the 150-600mm, especially at the longest zoom setting, I often kept to fast shutter speeds, at most stretching to one stop slower. But these settings were also based largely on the fidgetiness and movement of my subjects, which mandated fast shutter speeds to begin with.

​In Use: The Dual Role of the Tripod Mount
The lens comes with a removable tripod mount. Do not remove the tripod mount. You know what will happen if you do: you won’t find it when you need it. More to the point, I use the tripod mount as a grab handle when carrying the lens. And I’ve attached a sling strap to the mount.
 
Also, for better balance, at least with my D610 and D500 (without battery grip), I’ve used the rear screw thread on the tripod mount for this purpose. The lens's tripod mount comes with a built-in Arca-Swiss-style quick-release (QR) plate. There are two tiny screws (provided) that you should attach at the base for added security (hex wrench included). Periodically check them and tighten if required. (A little bit of clear nail polish should keep the screws in. A trick I learned from one of the nicest people in the industry, the camera repair maven, Marty Forscher.)
 
So, why do I carry the camera by the lens’s tripod mount if I’m using a sling? Whenever I use a sling, I always grab hold of the camera as I’m moving about so I can more quickly bring it to my eye. I usually grab the camera by the grip, but that’s not a prudent step with a long, heavy lens such as this. Hence my use of the tripod mount as a handle. (I strongly recommend that you steer clear of picking the rig up by the camera body, and especially in sudden, jerky movements, which may exert sufficient torque force to damage the camera.)

​In Use: Zooming and Focusing
Zooming, while smooth, is not as fast as I might like. You have to grab the lens’s zooming ring with your whole hand when zooming from one extreme to the other, and it takes several turns or one or two really good twists if you’re a contortionist. When I’m running around, I often prefer to retract the lens so it doesn’t protrude as much and bump into things. But I’ve gotten used to it. A push-pull mechanism option would have proved handy, although I’m not sure that might not play havoc with the lens’s mechanics and long-term durability.
 
For minor focal-length adjustments, by cradling the lens in the palm of your hand and then using both your thumb and index or middle finger, you can easily zoom. The way you position the tripod mount will affect how you zoom. Without it, you may find zooming goes more smoothly.
 
Manual focusing or manual focus override with AF is more to my liking, and quite smooth. I can manage that operation with a finger or two on the focusing ring.
 
Autofocus operation in and of itself is reasonably good. That is, of course, due in large measure to the D500 that I’m primarily using with this lens now. It was not nearly as good with the D610.
 
The old and new 150-600 feature Tamron’s USD (Ultrasonic Silent Drive) ring-type motor, but Tamron does claim better AF performance with this lens. How much of that is a function of the lens itself is difficult to measure, but I’ll take Tamron’s word for it that it’s improved over the previous iteration of this lens, since I can’t compare them side by side. Either way, the G2 is fast but sometimes doesn't seem fast enough with flighty subjects. But I could also be to blame for not responding as quickly as I should in these situations.

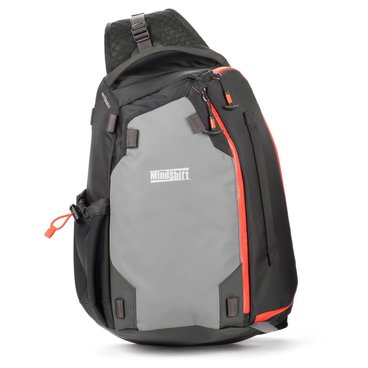
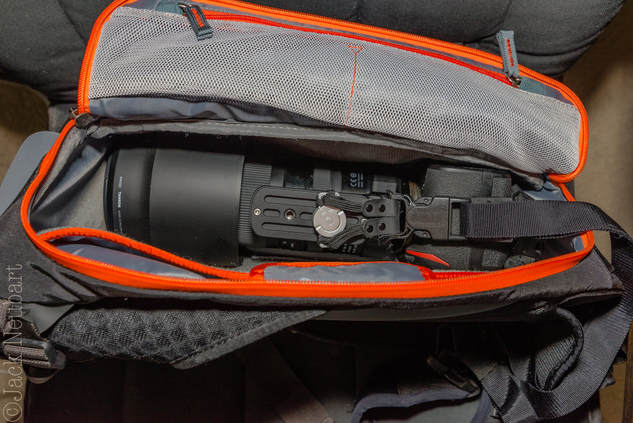
​Who Should Use This?
Wildlife photographers, bird photographers, nature photographers, sports photographers – from amateur to seasoned pro.
 
Capsule Comments
A beautifully crafted lens with weatherproofing and protective coating on the front element; takes a bit of getting used to; may be easier to handhold for some than for others; not as fast as I’d like, but the price is right; delivers crisp results.

Conclusions
I made the right decision buying this lens. Granted, knowing I was getting a heavy, bulky lens didn’t entirely clue me into how to manage working with the lens, and that’s something I’m still working on. In the interim, I’ve stared using a monopod to ease the burden. The removable tripod mount is a great asset, both for improved balance when mounted on a monopod (or tripod) and while carrying with the aid of a sling strap.
 
One of my early concerns was finding the photo backpack to use with this lens, but, as it turned out, I had numerous options. I've carried the lens attached to the camera in Think Tank Photo’s StreetWalker Pro V2.0 backpack, and in Mindshift Gear packs, namely, TrailScape 18L, Moose Peterson MP-3 V2.0 pack, and even the new PhotoCross 13 sling pack (a snug fit, but manageable - see photo below).
 
Weight and size aside, the quality of images this lens delivers makes me as happy as the proverbial clam.
 
I just wish it were a faster lens so I wouldn’t find myself resorting to ISO 6400 as often as I do.
 
Still, the close-focusing capabilities and the amazing reach of 900mm on my Nikon D500 combine to give me a very versatile lens. Not only have I used it for birds, deer, and small mammals, but I found it works well when photographing flowers and other plant life that would have been out of reach, as well as with more intimate landscape views, all with nice, soft backgrounds when shot at or near maximum aperture.
 
So what it all comes down to is this: This lens was a great buy. I highly recommend the Tamron 150-600mm G2 to anyone interested in bird photography and wildlife photography in general. Just take the time to get to know the lens and especially the various image stabilization modes before venturing out on that once-in-a-lifetime adventure.

SELECTED PRODUCT SPECIFICATIONS (per Tamron)
Model: A022
Focal Length: 150-600mm
Maximum Aperture: F/5-6.3
Angle of View (diagonal): 16°25' - 4°8' (for full-frame format)
: 10°38' - 2°40' (for APS-C format)
Optical Construction: 21 elements in 13 groups
Minimum Object Distance (min. focusing distance): 86.6" 
Maximum Magnification Ratio: 1:3.9
Filter Size: Ø95mm
Maximum Diameter: Ø108.4mm
Length: for Canon 10.2 in / for Nikon 10.1 in
Weight: for Canon 70.9 oz / for Nikon 70.2 oz (incl. tripod mount)
Aperture Blades: 9 (circular diaphragm up to 2 stops down from maximum aperture)
Minimum Aperture: F/32-40
Image Stabilization Performance: 4.5 stops (using VC Mode 3) CIPA Standards Compliant (For Canon : EOS-5D Mark III is used / For Nikon : D810 is used)
Standard Accessories: Lens hood, lens caps, soft lens case
Compatible Mounts: Canon (w/VC), Nikon (w/VC), Sony A-mount (w/o VC)
Specifications, appearance, functionality, etc. are subject to change without prior notice.


4 Comments

Test Report: MindShift Gear's PhotoCross 13 Sling Bag Is a Natural for a DSLR with Attached 150-600mm Zoom

7/11/2017

1 Comment

 
PicturePhotoCross 13 sling pack (orange ember). Courtesy MindShift Gear.
​If the PhotoCross 13, from MindShift Gear, can hold my Nikon D500 with Tamron 150-600mm G2 attached, imagine what other combinations of gear it can carry! That’s the surprising discovery I made on the third day working with this bag. But first allow me to detour for a moment with some thoughts on choosing between a sling and backpack for your photo gear.

​Sling vs. Backpack
I routinely prefer a backpack for my photo adventures into the wilderness, and even on the streets of Chicago. More to the point, I’ve never been one to wear or even favor a sling bag when carrying camera gear, except when testing these bags. They are favored by the younger generation, I’ll give you that.
 
Granted, when I wear a shoulder bag, namely the Signature 13, I do so largely sling-fashion, but that’s only because the strap on that bag lends itself to easy portage in this manner. And I carry a light load (read more on the Think Tank Photo Signature 13 here.) 
 
The problem with bags that carry the moniker “sling” is, in my experience, that the strap always cuts into my neck, largely due to a shoulder pad that is too stiff and inflexible. And many of these bags try to be a photo pack minus the backpack harness, meaning they strive to fit as much gear as possible, to the point where your neck and shoulder will hate you 15 minutes into your trek.
 
So when MindShift announced the PhotoCross, I approached it with some trepidation. Little by little, the bag started to grow on me. In the end, I may have found the one sling that fits me to a tee.
​
PicturePhotoCross 13 (with orange accents) on the left; PhotoCross 10 on the right. Courtesy MindShift Gear.
​Choosing the Right Size
I immediately opted for the larger of the two new PhotoCross sling bags. In determining what would be a good fit, I began with the product photographs on MindShift’s website – the pictures showing the bags decked out with a complete array of gear.
 
The second thing I did (and do routinely) before requesting a sample bag for testing and evaluation is to watch the product video. MindShift (as well as Think Tank) keeps the introductory video short and sweet. I try very hard to read between the lines, but, I have to admit, they keep the dialog tight and to the point. So the only thing left for me to do was to order the bag I felt would be the right fit. And that was the PhotoCross 13. It proved to be the right choice.
 

​PhotoCross on the Surface
Aside from a choice in size, you have a choice in color schemes. More realistically, it comes down to a choice in color accents. I chose Orange Ember, the other choice being Carbon Grey (hey, MindShift – this is the USA; we spell it “gray”! No need to get hoity-toity on us.). I would have been happier still with a bag that was predominantly orange, with gray (not “grey”) accents.
 
The color accents around the front of the bag key us into the zipper locations. There is an outside pocket, which I wish would have been pleated to accommodate a light jacket. But, as is, it’s still functional enough to hold any non-bulky extras you may need. There’s also a pair of smaller pockets inside this outer pocket. The other zipper leads to the main camera section, with additional pockets.
 
There’s also some accent stitching on the back – not that anyone will notice while you’re wearing the bag. Still, a nice touch. And there are other subtle color accents besides.
 
Okay, color schemes aside, let’s get down to the nitty-gritty. The body of the bag maintains a fairly svelte appearance. That’s not a fashion statement. That’s a practical feature. In the woods there’s less likelihood that the bag will hinder your progress in tight spaces and it won’t bump into people on buses and trains. Well, the tripod hanging off the back might, but you can always hand-carry it till you reach a clear path.

​The PhotoCross Harness System
This sling pack features a one-piece, adjustable shoulder strap, with thin, air-circulating, mesh-covered padding lining much of the strap. There’s a stretch of similar padding extending out from the base of the bag, which falls against your lower back. I wish this padding ran the entire length of the strap for added comfort.
 
That same mesh lines the back of the bag. However, lacking the raised shoulder and lumbar pads usually found on a backpack, this really didn’t provide much cooling. But there’s a way around that (read on).
 
The shoulder strap has no buckles to fasten and unfasten. While fasteners do make it easy to remove the bag when you’re seated, in every other conceivable situation, they’re a nuisance – and a potential hazard. With gravity and inertia taking over, you may lose your grip on one or both straps when trying to snap the ends together, or when unsnapping them, with the potential for the bag to come crashing to the ground.
 
And to sweeten the deal, there is even a set of compression straps – one at the top, another at the bottom – so you can better tailor the shoulder strap and ultimate fit to your comfort level. By this means you can separate the bag from your back a bit more for improved air circulation.
 
What’s more, there’s no sliding shoulder pad that you constantly have to readjust. The padding is part and parcel of the strap, so it moves with the strap. And, again, the soft padding on this bag ensures your neck won’t chafe from a stiff shoulder pad. You may still find yourself adjusting the strap to optimize your comfort level, but that’s something one does normally when wearing any bag.
 
There’s also a tuck-away waist belt. It’s largely there in case you’re negotiating treacherous terrain and want to prevent the bag from shifting and throwing you off-balance.
 
Couple that with a pair of hand straps to help you get a better grip on the bag. Add to that, the bag employs reinforced box-X stitching at stress points on the main handle. And the stitching on the bag overall is immaculate, with nary a loose thread that I could find.

PicturePhotoCross 13. I pulled out the dividers, positioning one as a "floating cushion" beneath the lens, then parked the D500 with attached Tamron 150-600mm G2 cozily in the bag.
​The PhotoCross 13 in Use
The bag is meant for a casual walk in the woods or on city streets, with a modicum of gear. You’re not going to get a gripped DSLR and long, fast lenses in here.
 
The main camera section has three, fully adjustable modules, with movable padded dividers (via Velcro-type hook-and-loop fasteners). What will that fit? I’ve carried a 70-300mm attached to the camera, a flash in the second module, and various accessories including sling strap in the third. Actually, you’ll be surprised at how much you can squeeze into this bag.
 
What’s more, I was pleasantly surprised when I was able to load my D500 and 150-600 zoom into this bag. It was a tight fit and getting this combo back in the bag while I was wearing it required a bit more of an effort than when removing the gear. It was also fairly easy to load this combo into the bag before donning it. I also managed to fit the Nissin i60 in a soft pouch on top when I'd started out.

If you’re wondering, if I had to remove the tripod mount on the 150-600, the answer is no. I inserted the camera into the bag lens first, camera grip upwards (portrait mode). And I rotated the tripod mount so it rested facing upwards, making it easy to grab the mount as a handle and pull up. Once out of the bag, the tripod mount was returned to its original position.
 
There’s also a tablet sleeve inside the camera section, lying against your back. I say “tablet,” not “laptop,” because I can’t see anyone schlepping a laptop of any size, unless it weighs no more and is no bigger than a tablet (contrary to specifications). I’m not even sure I’d carry a tablet, certainly not with the long-lens rig just described. Perhaps I would with a smaller, lighter load.
 
Because I wear hats, the hat does get in the way, requiring its removal when donning the pack, or removing it. A sling camera strap proved equally annoying when wearing this sling pack. I may try to sling the bag to the left and carry the camera at my right (for a fast grab – really, the only way to use a sling strap) and see how that works. Although I’ll probably just keep things as they are, being right-handed.
 
Given that the bag’s hand strap on top falls naturally in position for an easy grab with your right hand when the bag is carried to the left, I’m beginning to wonder if that wasn’t the intended carrying method. I gave it a quick try, but it didn’t feel natural, so back to the tried and true (subject to change without prior notice).
 
A third strap on the bottom would equal the score in terms of making it easy to grab and swing the bag around, but that may interfere with the integrity of the bottom panel, which is designed to be better resistant against wear to vertical placement and scraping of the bag on rocks and dirt.
 
All that aside, what’s important is that the entire time I wore the PhotoCross, I never felt as if it were choking me or cutting into my neck.
 
One thing I should point out. It may take a bit of trial and error to get the shoulder strap just the right length, while adjusting the compression straps for maximum comfort. For now I have the bag flush against my back at the top, but looser at the bottom, which seems to work for me.

Look for a review of the Nikon D500 and Tamron 150-600mm G2 soon.

Who Should Use This?
Hikers and nature enthusiasts; tourists; amateur photographers on a regular basis and even pros on vacation.
 
Capsule Comments
Fairly comfortable and protective; durable construction; customizable; thoughtfully designed; room for a tripod and full-size water bottle; weather-resistance aided by included rain cover; barely room for a jacket in the outer pocket but can be carried in place of a tripod, or perhaps with the tripod; holds a small laptop (PhotoCross 13) or tablet (if you must); PhotoCross 13 was surprisingly roomy – carried my DSLR with attached 150-600mm zoom.
 
Conclusions
On one outing, after detaching the sling strap from the camera, I put the camera down in preparation for returning it to the bag. Then it dawned on me: Hey, this is a sling bag! No need to take that extra step. Of course, I could have left the camera attached to the strap, but who knows how the mind works sometimes? (Either way, I often prefer to separate strap and camera till I reach my destination.) Anyway, I brought the bag around to the front and unzipped it, picked the camera up, tucked it safely into the bag, followed by the sling strap, zipped the bag, and returned it to its resting place against my back. The story doesn’t end there.
 
Going home I boarded a crowded Chicago “L” (subway) train, resigned to stand for much of the trip, when I spied a seat. I shifted the bag to the front, against my stomach, grabbed onto an overhead hand strap, and gingerly swung myself into the seat for a perfect landing that didn’t jostle the passengers on either side. Had I been carrying a backpack, this story would have ended quite differently.
 
Now here’s my full itinerary for the first three days of testing. It went something like this.
 
Day 1: Sweltering heat and humidity, but I managed a short walk around the neighborhood without feeling stressed out by the adverse conditions. Gear: Nikon D500, Nikon 18-200mm attached to camera, Nissin i60A shoe-mount; Custom SLR Glide One sling strap.
 
Day 2: This day saw me on a walking tour of Chicago Riverwalk for several hours, in the evening – cooler, but considerably more walking. Gear: D500 with attached 18-200mm, ultra-compact Sirui T-025X carbon fiber tripod; Giottos compact head carried inside the bag (so the tripod wouldn’t extend out from the bottom); Nissin i60A flash; Glide One sling.
 
Day 3: I headed into the woods sans tripod to photograph deer and wildflowers for a few hours – a mild hike on undulating paths, on a fairly muggy day. Gear: D500, Tamron 150-600mm G2 lens attached; Nissin i60A (although after packing away the camera with sling strap attached, couldn’t find room for the flash so ended up carrying it in a vest pocket); Glide One strap.
 
On that last day, as I set out on the bus, it also dawned on me that I would never have to put the bag down while on a bus or train. I could simply slide it around so that it reposed gently, without the full weight falling on my knees, allowing me to sit comfortably.
 
At this point, I’ve pretty much dedicated the PhotoCross to carrying my D500 and 150-600. Well, until this Sunday, when I hit Chinatown for a festival and will likely switch lenses – but not bags.
 ​

MATERIALS
Exterior: All fabric exterior is treated with a durable water resistant coating while fabric underside is coated with polyurethane for superior water resistance, YKK weather resistant zippers, 420D high-density nylon, heavy-duty nylon Tarpaulin, 350g air mesh, nylon webbing, 3-ply bonded nylon thread.
 
Interior: Removable closed-cell foam dividers, P210D liner, polyurethane backed Velex liner, 2x polyurethane coated 210T seam-sealed taffeta rain cover, nylon binding tape, 3-ply bonded nylon thread.

Where can I get more info/order this product? (Click on highlighted link.)
MindShift Gear (use this link to order direct)

 
Manufacturer:
MindShift Gear

 
How much is it?
$129.99/PhotoCross 13
$114.99/PhotoCross 10

​FEATURES (per MindShift Gear)
  • PhotoCross 13 fits an ungripped DSLR, 2 - 4 lenses including a 70-200mm f/2.8 and some 13” laptops
  • PhotoCross 10 fits an ungripped DSLR + 1 - 2 lenses + 10” tablet or mirrorless body + 3 - 5 lenses + 10” tablet
  • Weatherproof zippers and materials
  • Tripod or jacket carry with included straps
  • Dedicated, padded pocket fits a tablet or a laptop (10 = 10” tablet, 13 = some 13” laptops)
  • Easy rotation for rapid access to gear and accessories
  • 3-point harness for stabilization with tuck-away waist belt
  • Secure your bag by linking the zipper pulls together
  • Water bottle pocket locks in most 1 liter bottles
  • Breathable 320G air-mesh back panel keeps your back cool during long days
  • Internal zippered pockets for batteries, memory cards or other small accessories
  • Easily accessible front pocket for filters, snacks, or a light layer
  • T-pulls are easily gripped with or without gloves
  • Top and side carry handles
  • Fully customizable interior dividers for photo or personal gear
  • Seam-sealed rain cover included for downpour conditions

​SPECIFICATIONS
 
PhotoCross 13
  • Internal Dimensions: 9.4” W x 14.2” H x 5.5” D (24 x 36 x 14 cm)
  • External Dimensions: 12.6” W x 17.7” H x 7.1” D (32 x 45 x 18 cm)
  • Laptop compartment: 9.1” x 13” x 1” (23 x 33 x 2.5 cm)
  • Maximum weight (with all accessories): 2.4 lbs (1.1 kg)
  • Shoulder strap length: 42.5–62.2” (108–158 cm) (includes length of product)
  • Waist belt length: up to 63.8” (162 cm) (includes length of product)
  • Volume: 11 liters


​

PhotoCross 10
  • Internal Dimensions: 7.1” W x 12.5” H x 4.8” D (18 x 31.8 x 12.2 cm)
  • External Dimensions: 11” W x 15.9” H x 6.3” D (28 x 40.5 x 16 cm)
  • Tablet compartment: 8.2” x 11” x 0.6” (20.8 x 27.9 x 1.5 cm)
  • Maximum weight (with all accessories): 2.1 lbs (1.0 kg)
  • Shoulder strap length: 42.5–62.2” (108–158 cm) (includes length of product)
  • Waist belt length: up to 61” (155 cm) (includes length of product)
  • Volume: 7.5 liters


1 Comment

Test Report: Nissin i60 Compact, Multi-Mode Shoe-Mount Flash for On-Camera and TTL Wireless Operation, Including Radio TTL Wireless

7/7/2017

0 Comments

 
PictureNissin i60A. Courtesy NEIDLLC.
​Nissin introduced TTL radio wireless capability with the Di700A shoe-mount and Air 1 transmitter (reviewed here). Now this same wireless capability comes to Nissin’s latest flash, the i60A.
 
What sets the i60A apart from the Di700A is the new shoe-mount’s compact size and more extensive feature set. Does this mean it’s a better fit for you and your style of shooting? Let’s see…
​

But First a Few Words about Nissin TTL Radio Wireless Flash
Nissin labels its proprietary 2.4GHz TTL radio wireless technology NAS, for Nissin Air System (not to be confused with NAS, or network-attached storage, drives). Hence the “A” designation in both the Di700A and i60A – for Air-compliant. Out of the box, and without accessories, both shoe-mounts support on-camera and wireless TTL operation – but without radio triggering. It takes one key additional component to activate radio triggering, the Air 1 transmitter.
 
“Air” represents a key link in the system. An integral component (albeit optional) is the Nissin Air 1 transmitter, which sits in the camera’s hot shoe. The Air 1 controls and triggers the Air-compliant off-camera flashes, which are said to be slaved to the Air transmitter, or master.
 
All output and zoom settings are made on the Air 1. Only Group (and, where applicable, channel) settings are made on the remote units. You might want to designate different remote flashes under separate groups for better lighting control of subject and background. (Channel settings are rarely required and usually only come into play to prevent interference with devices on the same channel.)
 
If you use a TTL-dedicated, non-Air-compliant flash, whether Nissin or another brand, simply attach the optional Nissin Air R remote receiving module to the flash by way of the hot shoe and you’re in business, with camera, Air 1, and all remote components talking to each other to deliver reliable TTL flash exposures.
 
Radio control in this wireless system, according to Nissin’s specifications, will work with off-camera flash units to roughly 100 feet. Typically, radio triggering has the added advantage that it works even when those remote strobes are situated around corners or behind obstacles, in contrast to photo-optical and infrared triggering, which require a direct line of sight. And radio triggering is more reliable outdoors.
 
Keep in mind that these A-designated flashes will not trigger TTL dedicated strobes in any fashion (not even other Nissin strobes). They require a separate Master module, whether radio or optical/infrared, to trigger them in order to produce TTL flash exposures. However, they will trigger any flash that has a built-in photo-optical sensor, for conventional flash operation using manual exposure control.
​
​Nissin i60A: A Closer Look
The i60A is rather odd-looking. Seated in the camera’s hot shoe with head down (default position), the i60A presents a remarkably low profile. It manages to fit 4 AA batteries and all the circuitry into a squat little form factor.
 
So, what’s odd about it. Sitting on that compact battery housing/control center is a ginormous flash head. At least that’s how I’d describe it. The base of the i60A measures roughly two-thirds that on the Di700A in height. But the flash head itself is a tad longer than the head on its older sibling – by about 1cm. The depth of the head on the i60A (measured at the face, top to bottom), is about 2cm less (not including that odd bump toward the back of the i60A - possibly housing the capacitor). But when you add it all up, the head looks out of proportion, judging by its size relative to the base. Nothing wrong with that, but the overall size does warrant closer examination.
​
​Small, Yet Packs a Punch
Getting past the look of the flash, let’s see what this little shoe-mount is all about. For starters, the i60A is pimped up with all the shooting modes found on the Di700A, but with even more control. That means full TTL flash operation on camera and remotely. Remote operation extends to optical/infrared TTL wireless, photo-optical non-TTL wireless, and TTL wireless radio operation.
 
While we rarely use Guide Numbers (GN) in this day and age of TTL dedicated flash, the GN does give us a sense of the effective reach and power of the unit. And in that sense, it serves as a practical guide, hence “Guide” Number.
 
At ISO 100, the i60A will cover a distance of 89 feet (27 meters) at the 24mm zoom setting. At the 200mm setting (ISO 100), that jumps to 198 feet (60 meters). Compare that to any camera’s built-in flash. The i60A’s built-in diffuser panel and included dome diffuser will knock these numbers back a bit.
 
By the way, the i60A is a bit more powerful than the larger Di700A. At the 200mm zoom setting, the GN for the Di700A is 178/54 (ISO 100, ft/m). And the new flash is considerably more capable than the even smaller and older Nissin i40. The i60A is also the most expensive flash in the current Nissin lineup, even more than the flagship Di866 Mark II. The i60A draws on much of the functionality from the 866 Mk II while replacing more esoteric features and expanding on others.
 
The i60A adds one more feature not found on most shoe-mounts: a video light. This light, consisting of two LEDs (diffused), can be adjusted in brightness. And it’s bright! I didn’t realize it at first, but this video light would really come in handy at some point in a studio setup. And, if nothing else, it makes a great flashlight in a pinch. (You’ll also find this feature on the earlier i40.)
​
​The Interface – User-Friendly… to a Point
The interface on the i60A consists of a color LCD panel, dials, and buttons. The LCD panel is small but easily readable, if you have fairly good eyesight, that is. It is, however, difficult to read under bright lighting. I recommend you shade the display outdoors when changing settings.
 
Somewhat disconcerting, the panel dims almost immediately and there’s no way around this. But you can bring it back to full brightness by a press of any button, except, obviously, the on/of switch, or when changing modes.
 
The control dials may be a bit harder to read for some, especially if you suffer from astigmatism. The lettering is tiny and the detent marker on the mode dial doesn’t precisely align with the mode settings - nor is it clearly marked (it's raised), so you may do better paying close attention to the LCD display to get a better sense of the flash mode than to the mode dial itself. And in dim light, that may be the only way to read flash modes, unless you bring a flashlight or a cell phone with you.

Picture
Nissin i60A interface showing flash in full TTL mode (non-wireless), at -2 EV. To use the TTL wireless modes, shift the mode dial down to the Group settings: A, B, or C (with matching settings on the Master controller/transmitter/trigger). Courtesy NEIDLLC.
Picture
Nissin i60A interface showing flash in Manual mode, at reduced output, with zoom set at 105mm (zoom setting uses dial on the right). Courtesy NEIDLLC.
​Speaking of Those Control Dials
The dial on the left is for flash modes, with the following options. For on-camera (hot-shoe) usage: the green “A” is for fully auto TTL flash, whereas “TTL” gives you more complete TTL flash control, with the added option of onboard flash exposure overrides (to +/-2, in 1/3-step increments).
 
For remote operation, the dial offers SD (for pre-flash digital), SF (non-TTL-flash exposures with any optical flash/trigger), and A/B/C. The A/B/C settings are used with the Nissin Air radio-controlled system. (More on wireless operation below.)
 
The dial on the right provides settings for wireless radio channels (1 to 8) and manual zoom. The other settings control audio (beeps) and high-speed sync for cameras that don’t have that option built-in (not applicable to Nikon DSLRs). The key problem with these controls is that they’re so small that you need a fingernail to access them. Hold down the button until the display changes to the required parameter, for example, zoom focal lengths. Then turn the outer wheel, which is also used to change output settings for the applicable modes. The central button locks in settings.
​
​Wireless Operation
By the way, and this may confuse the issue somewhat, my D610’s built-in flash can be used to trigger the i60A in any wireless mode. In the absence of the Air 1 trigger, the A/B/C settings can also be used for non-radio (that is, optical/infrared) wireless TTL operation of either or both the i60A and Di700A, in the current example, with Nikon CLS controlling exposure.
 
You should also be aware that the i60A (and the Di700A) respond to the built-in flash on the Nikon D610 regardless of channel setting made in the camera or on the i60A. (There are no channel settings on the Di700A.)
 
In the final analysis, what’s really important is that TTL wireless control works reliably, whether via radio or optical/infrared control.
​
​Now More on That Flash Head
The flash head itself raises, lowers, and swivels without the use of a release button. The detents appear to be well enough engaged that the head won’t drop easily when you’re running around with the flash head up at an angle. Adding heavy bounce panels or other accessories to the head may, however, cause a precipitous and unexpected drop if you jostle the flash too much. However, the flash appears constructed well enough to tolerate a bit of mistreatment.
 
We should point to one practical consequence of this disproportionate head on the i60A. When you raise the head fully erect and position it on the mini-stand, the flash will topple over backwards, owing to a high center of gravity. Either lower the head two or three notches or, better yet, reverse-mount the flash on the stand for better support while still maintaining the original stance.
​
​Size Matters
The raison d’etre for this flash is its compact size. Compactness is one thing. But we do have to evaluate how this shoe-mount’s size affects performance. As it turns out, size does matter. But not as much as you’d think.
 
One of the reasons we avoid using the camera’s built-in flash with people (and sometimes animals) is because the on-axis light produced by the flash results in red-eye, where the pupils take on a pronounced blood-red color (due to bounce-back of light off the back of the retina). To mitigate against this possibility, we prefer to use flash off camera, or at the very least use a full-size shoe-mount flash. You could use a red-eye reducing pre-flash, but that destroys the spontaneity of the shot – not to mention the likelihood that your subject will move during that interval.
 
The i60A sits low enough that it could conceivably result in that same red-eye effect encountered with a pop-up flash. We can’t say that categorically, since numerous factors come into play – but I’m just throwing it out there as a possibility, perhaps even a strong probability.
 
We also have to consider the lens barrel and/or lens hood (lens shade) getting in the way and blocking the light. The good news is that tests with my Tamron 70-300mm lens, with and without lens shade, on my Nikon D610, bore out that, at normal shooting distances, you don’t get that arc-shaped shadow at the bottom of the screen, which would typically occur when the lens blocks the flash. So I decided to push it further. It proved to be true even when I moved in close with the lens.
 
I had even used a Tamron 90mm macro lens with attached lens shade on my Nikon D500 with no observable ill effects, shooting some very tight close-ups, I might add. I also tested the flash with my Tamron 15-30mm f/2.8 lens (with built-in lens shade), which has an 82mm filter diameter – a wide schnoz going up against a compact head – with no ill effects to report in terms of light blockage.
 
However, and this is not directly related to size, further tests revealed that light coverage was uneven at very wide lens focal lengths, as tests with the aforementioned 15-30mm lens on my D610 bore out. In fact, I’d recommend you shoot no wider than 24mm, even with the diffusion attachments. You may not notice this in everyday subjects, unless you’re shooting a wall or other uniformly toned flat surface.
 
PictureNissin i60A shown seated atop the included mini-stand, in bounce mode, with both panels in place, along with the included soft box (dome diffuser). Photo @2017 Jack Neubart. All rights reserved.
​No Confusion about Diffusion
In contrast to the Di700A, the i60A does come with a dome diffuser (diffusion dome), or “soft box,” in Nissin’s parlance. There is also a built-in diffusion panel that you pull out of a slot (for use with ultra-wide lenses) – but, in contrast to other shoe-mounts, here this panel extends from the floor, as it were, not from the roof of the unit.
 
What’s more, Nissin cleverly separated the bounce/kicker panel so that it slides out from the top of the unit, somewhat like an awning. On most flashes, trying to extract this panel means first withdrawing both the diffusion and bounce panel together, then returning the diffusion panel to its default position. Much simpler this way when you quickly want to add a catch light to someone’s eyes when using bounce flash.
 
Take all this to the next level. Let’s say you want to diffuse the light further. Simply raise the diffusion panel in place, then snap on the diffusion dome.
 
Now let’s take this one step further. Shooting with bounce flash but feel you’re losing too much light? Simply slide the bounce panel in place – without even removing the plastic dome. This flash opens up a world of opportunities in lighting, and we haven’t even taken it off the camera yet or added other strobes to the mix.

​In Use
Even after a few days, I’m learning new things about this flash. That’s not to say that there’s a long learning curve. Quite the contrary. I put the i60A to use as soon as I pulled it out of the box and installed batteries. But that may be easier for me, since I’ve only recently worked with the Di700A, not to mention a spate of Nissins in the past.
 
I first set about creating a tabletop set with a musical jewelry box in the form of a grand piano, with twirling ballerina on top. The initial setup used the i60A and Di700A as off-camera flashes triggered by the Nissin Air 1 transmitter seated in the Nikon D500’s hot shoe. I’d set the background flash – the Di700A – as Group B with a lower output setting, with the i60A at full power as the key light from in front and to the side. Everything worked as expected. Now came the next phase, capturing the ballerina performing a pirouette atop the piano. But, as is, there wasn’t enough ambient light to record the movement.
 
So the next day, I made a few changes. First, I draped black velvet inside the light tent. Black velvet has a way of catching the light as undulating waves, which adds depth to any still life set.
 
Then, just when I was about to set up the i60A as the key flash, with the Di700A again playing a supporting role, a voice in my head loudly chastised me, saying, Hey, use the video light! So I did. A few tests later and I had the light at the right brightness level.
 
I don’t know that I would call either shoe-mount the key light in this instance. After all, the contribution made by the video light was just as important to the shot as the flash illumination provided by the Di700A. By the way, to soften the light from the flash, which does not come with a diffusion dome, I added a small bounce panel.
 
What did the video light do? I set the exposure for slow-sync flash. That means, I used a relatively long exposure. At first I tried a half-second, then a full second. Still not quite what I wanted. So I pushed it to two full seconds – and that did the trick. The spinning figurine recorded as a soft blur of movement by the video light (which we’ll consider our ambient lighting) and was at the same time frozen in time by the flash.
 
I also added a silver panel directed at the front of the piano, notably for the legs and foot pedals (see the set shot). And if you’re wondering why I raised the piano lid all the way up, that’s because the ballerina kept bumping into it and getting knocked off balance – and the rod supporting the lid partially blocked the dancer.
 
I also took the flash outdoors. But I’ll let the pictures and captions tell the rest of this story.
​
Who Should Use This?
Any amateur just starting to use flash or who wants to add something extra to an existing flash setup.
 
Capsule Comments
Fairly easy to use and compact; multiple operating modes for both on-camera and off-camera use, including TTL optical/infrared and TTL radio wireless flash; digital LCD plus an array of dials and buttons (which may be difficult to see/use for some); dome diffuser included, along with built-in diffusion and kicker panels; powerful for its size; built-in adjustable video light. 
​
​Conclusions
The i60A represents a step up for Nissin. This flash builds upon the flagship Di866 Mark II and improves upon it, while doing all that in a smaller form factor.
 
For starters, the i60A is a complete package. It offers full TTL flash operation on camera and TTL wireless operation off camera, including radio triggering (as a slaved unit). The only thing missing is being able to use this flash to trigger remote strobes in a TTL configuration. Hopefully that will come in the next generation Di866, which is due for a refresh, complete with that “A” (Air) designation and radio control (both transmitter and receiver).
 
A welcome first for a Nissin flash, when the i60A is set to a non-wireless mode, which includes the video light, the flash enters standby when the camera is switched off, and is re-animated when the camera comes back to life. Previous Nissins failed to be put to sleep or awakened by the camera. (Wireless operation mandates that the flash remain in a ready state.)
 
Complete mastery of the controls does involve a bit of a learning curve – considerably more so than with the Di700A – but you’ll get the hang of it soon enough. I’d say this unit is better suited to younger individuals. Those with failing eyesight and arthritic fingers would do better with the Di700A.
 
Finally, Nissin stands head-and-shoulders above those cheap knockoffs of OEM (original equipment manufacturer) shoe-mounts. Some may argue over whether these Nissin flashes can go toe-to-toe with gear from the original manufacturer. However, given a very inviting price point combined with a full feature set that includes every practical mode of TTL wireless flash operation, Nissin gear can’t be beat. And the Nissin i60A shoe-mount is certainly a step in the right direction.
​
Compatibility
The Nissin i60A is available for Nikon, Canon, Sony, Micro Four Thirds, and Fujifilm systems.
 
SELECTED PRODUCT SPECIFICATIONS (per Nissin)
Guide no. (at ISO 100): GN60 (in meters, at 200mm zoom head position)
Focal length coverage: 24mm – 200mm (16mm when using built-in diffuser)
Power source: 4 size-AA batteries
Recycling time: 0.1- 5.5 sec
LED video light operation time: 3.5 hours
Flash Duration: 1/800- 1/20,000 sec
Color temperature: 5,600K
  Wireless mode: 2.4Ghz Nissin Air System radio wireless, Optical wireless TTL slave, non-TTL Slave (SD, SF mode)(*4)
EV compensation on flash: +/- 2EV in increments of 1/3 EV
Bounce/swivel: Up: 0°- 90°, left/right: 0°-180°
Operation panel: Color LCD with dial control
Manual mode power ratio: 1/256 - 1/1 (1/3-step increments)
Mode: Auto, Manual, SD, SF, Wireless with A, B, C & channel selection (2.4Ghz Nissin Air system & optical) (*4)
Dimensions: 112 (H) x 73 (W) x 98mm (D) / 4.4 (H) x 2.9 (W) x 3.6” (D)
Weight: 300g/ 10.8oz (excluding batteries and soft box)
​
Manufacturer
Nissin
 
Distributed by/Order From/More Info:
www.neidllc.com (order from authorized resellers)
 
How much is it?
$339.99
​
Additional Reading (click the highlighted link)
Read my introductory feature story on TTL wireless flash in Shutterbug Magazine (online).
 
Read my feature story on No Strings Attached With Wireless TTL Flash for multiple-flash photography in Shutterbug Magazine (online).
0 Comments

    Reviews

    TECHNICAL EDITOR
    Jack Neubart


    Archives

    December 2019
    September 2019
    August 2019
    July 2019
    May 2019
    April 2019
    February 2019
    November 2018
    September 2018
    August 2018
    May 2018
    January 2018
    November 2017
    September 2017
    July 2017
    June 2017
    May 2017
    April 2017
    February 2017
    December 2016
    November 2016
    October 2016
    August 2016
    July 2016
    May 2016
    April 2016
    March 2016
    February 2016
    January 2016
    December 2015
    August 2015
    December 2014
    August 2014
    July 2014
    April 2014
    November 2013
    October 2013

    Categories

    All
    13x19-inch Printers
    35mm-style Digital Cameras
    Acratech
    Adobe Software
    Austin
    Backpacks
    Ballheads
    Camera Backpacks
    Camera Bags
    Camera Cases
    Camera Holsters
    Camera Luggage
    Camera Supports
    Canon Cameras
    Canon Lenses
    Compact DSLRs
    Compact Photo Printer
    Compact System Cameras
    Desktop Printers
    Digital Projectors
    Digital Retouching
    Digital SLR
    DSLR
    Epson
    Exposure Control
    Fashionable Bags
    Fast Lenses
    Film Emulation
    Flash Photography
    Hawaii
    HDR Plug-in
    HDR Software
    HD SLR
    HD-SLR
    High-resolution DSLR
    Holster Bags
    Image-editing Software
    Image-stabilized Lenses
    Inkjet Printers
    L Bracket
    L-bracket
    Lens Cases
    Lenses
    Lens Pouches
    Leveling Base
    Long-lens Bags
    Macphun
    Macro
    Macro Flash
    Manfrotto
    Mega-zoom Digital Camera
    MindShift Gear
    Mirrorless Cameras
    Nikon Cameras
    Nikon Digital Cameras
    Nikon Mirrorless
    Nikon Pro Digital Cameras
    Nissin
    Nodal Rail
    Nodal Slide
    Olympus
    Outdoor Photography
    Panorama Head
    Panoramas
    Panoramic Photography
    Photo Accessories
    Photo Backpacks
    Photo Belts
    Photo Luggage
    Photo Rollers
    Plug-ins
    Point-and-shoot Zoom
    Portrait Retouching Software
    Printer
    Pro Cameras
    Pro Digital Cameras
    Radio Remote Flash
    Radio TTL Wireless Flash
    Rain Covers
    Rain Hoods
    RAW Conversion Software
    Review: Photo Accessories
    Review: Phottix Odin Radio Remote
    Review: PocketWizard ControlTL
    Review: Software
    Ring Flash
    Rolling Cases
    Samsung Cameras
    Shimoda Designs
    Shoe Mount Flash
    Shoulder Bags
    Shutterbug.com Review
    Shutterbug Magazine
    Sigma Lenses
    SKB Cases
    Sling Bag
    Sling Bags
    Sling Pack
    Snapshot Printer
    Software
    Software Effects
    Super Wide Lenses
    Super-wide Lenses
    Superzoom
    Tamron Lenses
    Telephoto Zooms
    Tenba
    Texas
    Think Tank Photo
    Tripod Heads
    Tripods: Carbon Fiber
    TTL Radio Wireless Flash
    TTL Wireless Flash
    Ultra Wide Lenses
    Ultra-wide Lenses
    Ultra-zoom Digital Camera
    Wide Format Printers
    Wireless Flash
    Zoom Lenses

    RSS Feed

    All products and services are the trademarks or registered trademarks of their respective owners.
    Use or mention of any product or service is not an endorsement - compensated or otherwise.
    However, manufacturers, distributors, vendors & services may provide products or services for use.

    Your purchase and/or use of any product or service tested, reviewed, listed or mentioned is solely at your discretion and you release us from any and all liability associated with such purchase and/or use.

Your satisfaction, our expertise. They go hand in hand.
Bringing over 35 years' experience into everything we create.

Entire contents of this website is comprised of original works created by Jack Neubart, including but not limited to photographs, digital work, musical compositions, stories, humor, poetry, and any other artistic or textual material. 
All work Copyright ©2021 Jack Neubart and is protected under United States and International laws and treaties.
All rights reserved. None of the contents may be copied, extracted, abstracted, adapted, transmitted, digitally altered, or otherwise used or published without express permission of the Copyright owner.
Webmaster: Jack Neubart (building on a Weebly.com template).