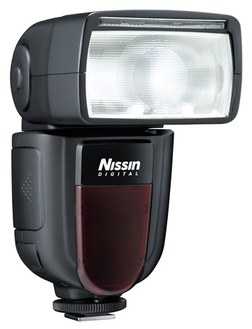
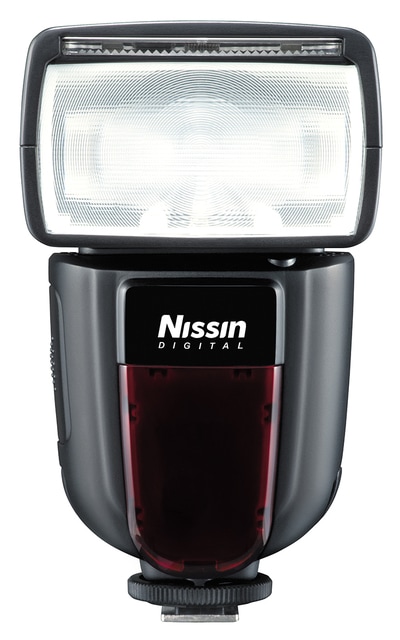
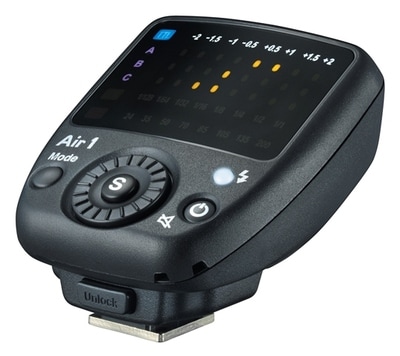
 The Di700A offers full tilt/swivel control, TTL flash on camera, and wireless control, including optical/infrared and radio remote wireless TTL flash. It comes with built-in diffusion and bounce panels. Courtesy NEIDLLC.
 Well, Nissin has upped the ante, bringing you a user-friendly, priced-right multi-mode wireless flash system that will take your flash photography to the next level – with radio remote TTL flash control as a featured mode in the Di700A. Don’t really care about radio control or wireless operation in general? Well, this flash doesn’t stop there.
Out of the box, the Di700A can simply be used as an on-camera flash. As with its predecessor, the flagship Di866 Mark II (which remains in the lineup), it features a tilting/rotating head and full TTL-flash integration. TTL flash practically guarantees usable exposures.
Unlike that found on the flagship model, the control panel on the Di700A is simpler, yet stylish in its simplicity, as it’s an uncluttered color display. It certainly beats the uninviting display found on the Di600.
You can purchase the Di700A ($259) and Air 1 ($89) separately. However, you’ll save about $50 when you order the combo package at $299. The Air 1 commander/controller is only necessary if you plan to use the Di700A as a radio-controlled remote (off-camera) TTL flash. Otherwise, the flash is fully functional on its own or in other wireless setups. (Note: you can’t mix and match radio and non-radio triggering and still achieve full TTL flash exposure control.)
Separately, the Di700A is actually less expensive than the Di866 Mark II, which sells for $275, and in my book a much better buy than the older flash, unless you need esoteric functions such as built-in sub-flash (for fill with bounce lighting) and stroboscopic mode.
The graphical user interface on the Di700A offers up numerous operating functions. A, for Auto, is the most basic TTL-flash setting and doesn’t allow you any additional options on the flash itself. The flash takes over, but it remains tied to the camera’s settings, where overrides (such as ISO, f-stop, shutter/sync speed, and flash exposure compensation) still come into play.
For more control, use TTL mode. At this setting, you’re presented with the option to increase or decrease flash output on the flash unit itself, up to +/- 2 steps, in half-step (but not third-step) increments. I’m not sure why, but I’ve always found that setting flash compensation on the flash proved more reliable than making similar settings in the camera. And since Nikon cameras only give you +1 flash compensation (albeit going as far as -3), the maximum override of +2 on the flash itself may prove handy.
M (Manual flash output) lets you set output from full to 1/128, in whole-step increments. (If you need an interim setting, try diffusing the flash or moving the flash further away from the subject to decrease output, moving it closer to increase.) Manual mode should ideally be used in conjunction with a flash meter, but you can play around and arrive at usable settings without that handheld accessory.
Next we have the wireless settings that come into play with the Di700A as the sole off-camera flash or in tandem with other flash units positioned off camera. There are two modes for use with conventional (non-radio) wireless triggering. The first is SD (“D” for Digital). Use this setting when you use any TTL flash system that emits a pre-flash, which would typically be any camera-dedicated TTL-flash. The triggering pulse is infrared or optical/infrared. When it comes to Nikon, the Di700A supports Nikon CLS for non-radio-triggered TTL flash exposure control. The camera can be set to any of these modes: Manual, Aperture-priority, Shutter-priority. You should manually set ISO.
SF (which I take to mean “Standard Flash”) wireless mode is for use with non-dedicated strobes that are used to trigger the Di700A, such as a studio flash (for instance, in this setup you might use the Nissin flash as a kicker for a highlight or as a hair light). That said, the built-in flash on my Nikon D610 did also trigger the remote Di700A. The triggering pulse for SF is photo-optical. Set the camera to Manual shooting mode for SF triggering, so that you have full control over both flash and ambient light components, via, respectively, F-stop and shutter/sync speed. You should also manually set ISO.
The final, and newest for Nissin, wireless flash mode is radio-frequency wireless TTL-controlled remote, or simply TTL radio (radio TTL) remote. For this mode there is an icon, which kind of looks like the more familiar podcast icon. The working distance is about 100 feet, about three times the reach of typical infrared or optical triggering. What’s more, radio signals are not blocked by trees or walls, in contrast to infrared and photo-optical signals. So you can trigger a flash in another room, to prevent the space from being seen as a black void if it shows in the picture. However, electrical wiring, steel beams, and electronics may interfere with the signal. I’m told that even an intervening snow bank can limit the effective reach.
Important: this radio remote system operates at 2.4GHz and, according to industry sources, can be used around the world without interfering with other devices. (But when in doubt, check with local authorities.) Devices that use other frequencies may be restricted and categorically illegal overseas.
When in radio remote mode, the Di700A is not typically triggered by a camera flash. However, if there's no radio signal, Nikon CLS kicks in with the built-in flash on my Nikon D610, triggering the Di700A for full TTL flash control.
As with all radio systems, a triggering device, or transmitter, is required. For radio-controlled TTL flash, that trigger is the Air 1, which sits in the camera’s hot shoe, electronically carrying on a conversation between camera and flash. (Note that the foot on the Air 1 has all the needed pins to coincide with those in the camera’s hot shoe.)
When I first set up the system, I wondered why my Nikon D500 had the radio setting grayed out. Typically, when using Nikon’s own dedicated radio transmitter, this setting must be activated. Well, I learned that Nissin’s system, as with other third-party TTL wireless radio systems, bypasses such settings. In fact, you still get full TTL flash control. More to the point, in contrast with Nikon’s own system, which currently limits wireless radio TTL flash control to Nikon’s own system and the D500 and D5 bodies, the Nissin system can be used with any Nikon DSLR that supports TTL flash control. Which is why I ended up using it with the Nikon D610 – and did so without any hassles. It worked every time.
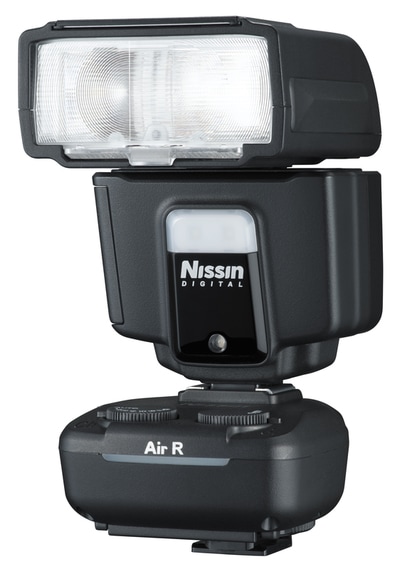
I tested the Nissin radio-controlled TTL flash system with both the Di700A and with a Nikon SB-900, in conjunction with my Nikon D610 DSLR. The only difference: the Di700A was triggered directly, without requiring any accessories, as it has a radio receiver built in. To trigger the Nikon flash, I had to attach the SB-900 to an optional Nissin Air R module.
The Nissin Air 1 is the radio trigger that was seated in the camera hot shoe, triggering both off-camera strobes – the Di700A and, via the Air R, the SB-900. Everything worked fine, with the setup reliably delivering usable TTL flash exposures.
When testing the flash in SD (pre-flash digital) wireless remote mode, I used the built-in flash on the D610 as the trigger, setting the flash internally so it wouldn’t fire and contribute to the flash exposure, but instead would simply trigger the remote unit. No problems here either, with everything working smoothly.
In short, when it came to shooting with my Nikon D610, I’d call my tests with the Nissin Di700A and Nissin dedicated Air system a resounding success. I’ll put the next Nissin flash – the compact i60A – to the test with my Nikon D500 when that flash arrives.
| PRO TIPS – Keep These Things in Mind - The shutter speed controls the amount of ambient light (background or surrounding existing illumination) that you allow into the picture; the F-stop controls the amount of flash illumination hitting the subject. - If you want subtle fill-flash, use a small F-stop to limit the reach of light; if you want to overwhelm or balance the surrounding available light, use a large F-stop. - If you use one of the camera’s autoexposure shooting modes with TTL flash, you’ll likely end up with balanced fill flash or even a brightly lit subject, but watch that bright backgrounds don’t underexpose (they may need a boost in ambient exposure compensation). - When using TTL flash, you can also control the amount of flash hitting the subject with the flash AE/FV override (+/-) settings either on the flash or in the camera, as applicable. When using both settings – on camera and flash – note that the effect is cumulative, but a negative setting on one will cancel out or reduce a positive setting on the other. For example, if you set +2 on the flash and -3 on the camera, the net effect is a loss of 1 stop in flash illumination, so watch your settings. - When employing available-light AE override (AE exposure compensation) settings, these may affect the entire flash-plus-ambient TTL exposure or only the ambient TTL exposure, depending on the camera or your menu settings. These settings may also affect Manual shooting mode settings made with the camera, again depending on your system. You should test your setup beforehand. - When using the flash in any TTL mode, flash output is read by the camera, through the lens, and so changes in distance are automatically compensated, as is the use of filters or lens extension. - Keep in mind that when using the flash in M mode, flash exposure of the subject is tied directly to flash-to-subject distance. Any decrease or increase in that distance will affect the flash exposure for the subject, respectively increasing (with decreased distance) or decreasing (with increased distance) the amount of flash exposure for the subject. Also affecting flash exposure when setting the flash to Manual: the use of filters and lens extension, each requiring an increase in flash exposure (the amount varying with filter density and color and amount of lens extension). - Very important: keep in mind that for photo-optical and infrared triggers to successfully trigger a remote flash, there must be a direct line of sight between them. This is critical outdoors. Indoors the signal can bounce around (although not a guarantee, so line of sight is recommended). If you position the flash behind a tree, it will not be triggered, unless something nearby happens to reflect the triggering beam in the direction of the flash receiving the triggering pulse. Also, outdoors the distance between transmitter and receiver may be limited to no more than 20 or 30 feet. - Getting technical: the triggering device (which emits a photo-optical, infrared, or radio frequency pulse) is called the Master. The Master triggering pulse usually comes from a flash seated in the hot shoe, a built-in flash, or another device that’s seated in the camera’s hot shoe. The remote (off-camera) flash being triggered is called the slave. Remote flashes are said to be slaved to the Master flash or triggering device. With both infrared and radio remote triggering, you can assign different off-camera flashes to a group designation, which is commonly A, B, or C. The reason for doing that is so that you can independently set output for each group. This way you can have one or more flashes off-camera assigned to Group A as your key light at one output setting, and Group B could be one or more flashes at the same or different setting illuminating the background, with perhaps a Group C flash at reduced output as a hair light. | Who Should Use This? Any photographer from novice to advanced; even pros will find it does the trick for them. Capsule Comments Offers multi-mode remote operation, especially radio TTL flash, as well as other wireless TTL and non-TTL modes; user-friendly; consistent; supports various sync settings (verify for your camera); reliably worked with my Nikon D610 for TTL flash control on or off the camera. The only thing missing is a dome diffuser. (Why’d you leave that out of the package, Nissin?) Conclusions When choosing among Nissin strobes, if you want enhanced capability without unnecessary extras, the Di700A is the way to go. And for the difference in price compared with the Di600, the Di700A is well worth the investment. You’ll also find it much less intimidating than the top-of-the-line Di866 Mark II, with a much more user-friendly interface. And it’s more fun to use than any Nissin flash I’ve worked with to date. What’s more, you can start using this flash right out of the box, the moment you insert the batteries, with the full assurance that you’ll get the job done. Set aside all the features, which include full radio TTL flash control, and you’re left with a friendly price, user-friendly operation, consistency, and reliability – and that alone marks the Nissin Di700A + Air 1 (radio controller) combo as a winner. Then add the Air R for your flashes without built-in radio TTL-flash control and you’ve got a full studio in a bag. What’s not to love about this system! Compatibility Dedicated versions for Nikon, Canon, Sony. Tested with Nikon. Di700A SELECTED PRODUCT SPECIFICATIONS Type: shoe-mount flash Shooting modes: Auto TTL, TTL (with onboard override settings); wireless operation (infrared, photo-optical, radio remote) Guide no. (at ISO 100 in M): GN54 (at 200mm zoom head position); GN48 (at 105mm zoom head position); GN28 (at 35mm zoom head position) Flash duration: 1/800 to 1/30,000 sec. Color temp: 5600K Bounce/swivel: Yes/yes Control panel: digital color panel + control wheel/Set button Wireless operation: 8 channels, 3 groups Power source: 4 AA batteries Included accessories: soft pouch, mini-stand Dimensions: 140(H) x 75(W) x 115(D) mm/ 5.5 (H) x 3(W) x 4.5(D) inches Weight: 380g/13.4 oz (w/o batt.) Manufacturer Nissin Distributed by/Order From/More Info: www.neidllc.com (order from authorized resellers) How much is it? $299/Di700A + Air 1 combo $259/Di700A $89.99/Air 1 (on-camera TTL-flash radio transmitter) $69.99/Air R (TTL-flash radio remote receiver – attaches to off-camera flash other than Di700A, such as Nikon SB-700 or Nissin Di866 Mark II) Additional Reading Read my review of the Nissin Di40 pocket-size flash here on this site. Read my review of the Nissin D866 Mark II in Shutterbug Magazine (online). Read my review of the Nissin MF18 macro ringflash in Shutterbug Magazine (online). Read my introductory feature story on TTL wireless flash in Shutterbug Magazine (online). Read my feature story on No Strings Attached With Wireless TTL Flash for multiple-flash photography in Shutterbug Magazine (online). Read my roundup of the original group of Nissin flashes in Shutterbug Magazine (online). |


 RSS Feed