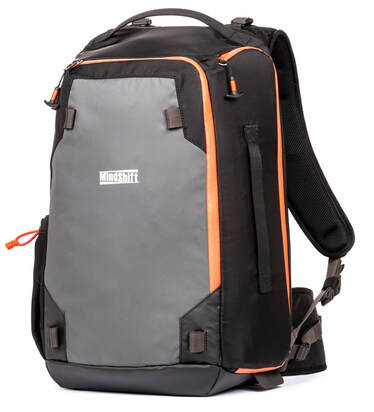
 MindShift Gear's PhotoCross 15 Backpack. Courtesy Think Tank Photo.
 MindShift Gear's PhotoCross 15 Backpack. Courtesy Think Tank Photo. MindShift Gear's PhotoCross 15 Backpack. Courtesy Think Tank Photo. There’s no question that, when it comes to outdoor photography, whether close to home or far away, my go-to camera bag is a backpack. Which is why I welcomed the opportunity to field-test MindShift’s new entry in their PhotoCross lineup, the PhotoCross 15. So, did the PhotoCross 15 meet all my expectations? Will it become my go-to camera bag on outdoor adventures? And what features set it apart from the traditional sling or backpack? Let’s see…
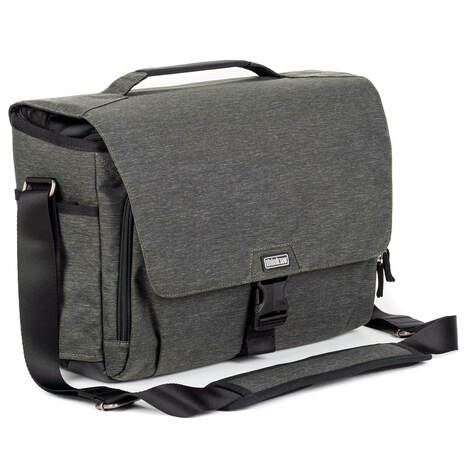 Think Tank Photo's Vision 15 shoulder bag. Courtesy Think Tank Photo. Think Tank Photo's Vision 15 shoulder bag. Courtesy Think Tank Photo. Photo backpacks aren’t for everyone or every occasion. Even hardened backpack users find themselves turning to a shoulder bag or sling bag to carry their precious camera gear. And if you’re looking for a modestly priced shoulder bag that also delivers on quality, then a good starting place is Think Tank Photo. And you might want to consider the new Vision series. For the most part, I’ve avoided writing about lens pouches and related accessories because, frankly, I rarely use them. But when Think Tank upgraded their lens pouches, protective covers, and photo belts, I thought, hmm, maybe it’s time to reevaluate my decision. Think Tank was generous enough to send a selection of these items for review.
Don’t get me wrong: I still prefer to travel light, unencumbered by anything that might weigh me down. But there are occasions when you need that extra something to make your life easier on the trails or even while negotiating the streets, byways and alleyways of a distant shore and, notably, to facilitate lens changes wherever you happen to be, even close to home. The problem becomes even more pronounced when you’re carrying gear in a backpack and the ground is muddy or wet and you can’t find a dry spot anywhere to conveniently set the pack down so you can get at that gear. Or when you’re in a tenuous situation where it might not be prudent to turn your back for the few minutes it takes to access gear from a backpack that’s sitting on the ground (watch out for that buck behind you!). The Think Tank products that neatly fit the bill here are the Lens Case Duo and Lens Changer series. And, speaking of wet, we don’t all use cameras and lenses that have been waterproofed. Even if we do, some added protection against rain and snow and blowing debris couldn’t hurt. That’s when a water-repellent rain hood comes into the picture. And Think Tank offers two solutions to tackle these nasty situations: the Hydrophobia Rain Cover V3.0 and Emergency Rain Cover series. Finally, you may need some means to carry all these accessories conveniently. Attaching lens pouches to a backpack that you’ll first have to remove is counterproductive. And you can’t depend on the backpack’s waist belt since, sooner or later, you’ll be unfastening it, if you even buckle it in the first place, which I rarely do. And shoulder/sling bags don’t all provide attachment points. Besides, the added weight may add to the strain of carrying the bag at your side. And, whereas you could use the belt that holds up your pants, not everyone wears pants – or a belt. And even if you do, carrying accessories on your belt can be a real drag. So a special belt might be in order. And here too Think Tank comes to the rescue - with the Thin Skin Belt V3.0. The lens pouches we’ll be reviewing are designed to be carried on this belt, as well as the more heavily padded Pro Speed Belt V3.0 (not reviewed here). 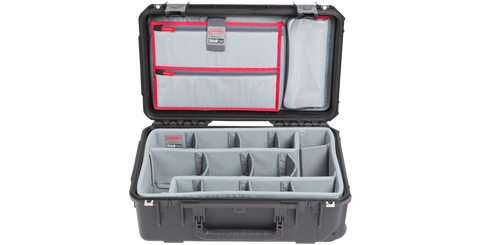 SKB model 3i-2011-7DL with Think Tank insert and lid organizer. Courtesy SKB Cases. SKB model 3i-2011-7DL with Think Tank insert and lid organizer. Courtesy SKB Cases. There’s a good argument to be made for using a molded hardshell case, especially one with wheels. And for starters, let’s put it out there in the photoverse… the SKB case model 3i-2011-7DL with Think Tank insert will give you a pretty good ride. But is it a perfectly smooth ride? Read on… 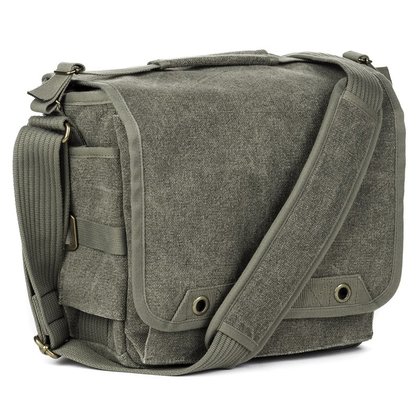 Courtesy Think Tank Photo. Courtesy Think Tank Photo. There is something about Think Tank’s Retrospective shoulder bags that has to be experienced personally. I’d previously tested the leather version of the original series and found it eminently suited to my trip to New York. (Read about it here.) But that was a small bag that I chose because it would fit inside my luggage. And even before that I’d worked with the original Retrospective. Yet another small bag. This time I thought I’d go for something bigger, but not quite as spacious as MindShift Gear’s Exposure 15. And I certainly wasn’t about to tote around an even bigger shoulder bag, although, if you are of that mind, there are two larger versions of this bag available. I was especially curious to see what improvements were made to this series. I would not be disappointed, though I did find room for improvement.
The Handy Water Bottle Pocket A water bottle pocket has been added. I would have preferred a stretch mesh pocket, but I can see Think Tank’s thinking behind the design they used. A nylon pocket would not be in keeping with the retro-canvas styling of the bag. Either way, it now means you don’t need to add an accessory pouch just for a water bottle. You can, however, add a lens case by way of the loop on the flip side of the bag (more on Think Tank’s new lens cases in a later review). You could hold a lens in this side pocket, but I would hesitate to do so for any length of time. There’s no real way to secure the pocket, and a lens could slip out when you’re not paying attention. You know what would have been cool? A sealable lid, via Velcro, a zip, or even a snap or clasp. But, again, it could come in handy when changing lenses, if not already occupied by a water bottle. (Here’s a thought. Attach a carabiner to the opposite side and your water bottle to that, if the water bottle provides some means by which you could do that.) The one thing that bugs me, and I found it to be somewhat of a nuisance on Think Tank's Signature 13 as well, is the tuck-away interior flap that has been added to the new Retrospective bag. As I’d commented previously, I would have preferred a double-zip system. But I’m not sure that would have helped. And here’s why… The pliable shell of the Retrospective, while imbuing the bag with that retro-chic feel, makes it difficult to close the flap. I recommend either not zipping the inner lid all the way once you arrive at your destination, or not using it entirely. If you take the latter route, it means using the noisy and somewhat resistant Velcro system to keep the bag closed. There are noise-silencers built in, but using them (and not closing the inner flap) means you leave the bag entirely open – not a smart move in a crowded bus or subway, or while dashing around town, or putting your bag down on an uneven surface where it may topple over. So you’ll have to use one or the other once you start shooting. But let me make myself clear: Until you arrive at your destination, unless you expect to stop along the way to shoot, use both means to keep the contents secured. You’ll keep dust and dirt out, as well as prying hands. It may be picayune to quibble over this, and I’m sure you’ll get the hang of it, one way or the other. But, hey, I like to quibble over the small stuff. If the world smelled entirely of roses, we wouldn’t have carnations. Okay, not sure what that means, but maybe you do. Anyway, none of that matters in the long run. The bag does the job it’s designed to do. Conclusions
Oddly enough, I find myself lately taking a shoulder/sling bag out, even on my nature walks, preferring it over my backpacks for immediate accessibility to my gear, provided I’m not toting a heavy load or very long lenses, and don’t need to carry a trail kit or light jacket. Would I use this new Retrospective V2.0? In a heartbeat. Regrettably, I miscalculated. I thought I’d be able to fit my D500 with attached Tamron 100-400, but it didn’t prove to be a comfy fit. A deeper bag would have done the trick. So I’ll stick with my Exposure 15 for that rig. It wouldn’t be a problem if I carried body and lens separately, but I prefer having my gear at the ready – hence my rationale for using a shoulder bag in the first place. All in all, as with its progenitors in the Retrospective lineup, the Retrospective V2.0 looks classy, feels classy, and, in short, is a class act. You’ll look good with this bag hanging off your shoulder or sling-style and you’ll feel good knowing your gear is well protected and within your grasp when the moment counts. 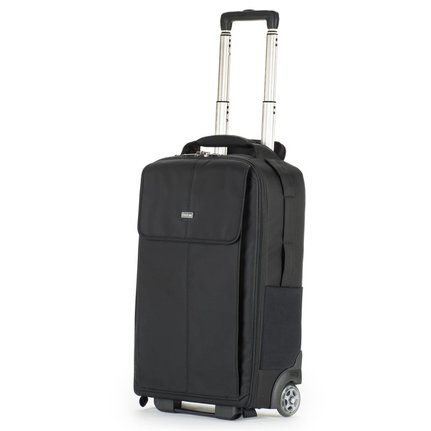 Think Tank Photo's Airport Advantage Plus. Photo courtesy Think Tank Photo. Think Tank Photo's Airport Advantage Plus. Photo courtesy Think Tank Photo. When I stand Think Tank Photo’s new Airport Advantage Plus up next to the Airport Security v3.0, the Advantage Plus looks svelte by comparison. In fact, even when standing on its own it looks slim and trim. Unfortunately, you can’t say it looks stylish as is, but Think Tank has some accessories to lend it a hand in that department, such as colorful wheels with Roller Flair, which also adds other color accents ($35).
Soft-Sided Luggage All Airport cases are considered soft-sided luggage, in contrast to hard-shell cases made of ABS, resin, or metal. As such, they utilize a zipped closure system, but are lockable. I keep TSA-compliant combination locks on hand for this purpose. The only thing to watch for is that you don’t over-expand the case with stuffed outer pockets. One added advantage to practically any soft-sided luggage is the addition of outer pockets to stow anything from a laptop (inside a protective sleeve) to a pair of flip-flops. The flip-flops might even serve to cushion the laptop against bumps, to a degree. Each of these cases has a weather-resistant fabric outer layer, but also comes with a rain cover for torrential downpours. With the rare exception of 4-wheelies, each is two-wheeled, offering an exceptionally quiet ride, with sturdy telescoping handle, plus additional handles to make sliding the bag in and out of the overhead easier. Conclusions
Once fully loaded, no camera luggage feels light. Still, if you can shave a few ounces off your burden, it should be welcome over the long haul. While you can’t go wrong with any of the Think Tank Airport luggage, the Advantage Plus has the advantage of a more compact size that affords you greater visibility of your gear, while keeping a lid on how much you carry. The point being, you take what you need and nothing more. Makes sense to me. It’s called planning. 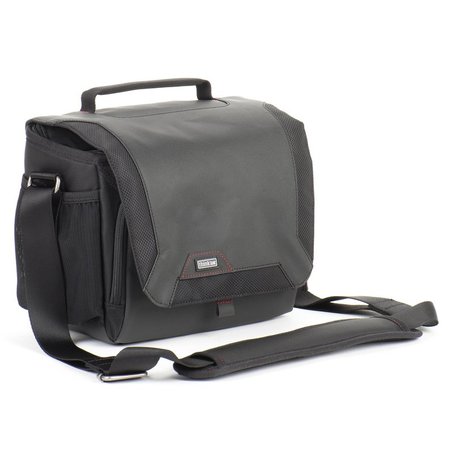 Spectral 8. Courtesy Think Tank Photo. Spectral 8. Courtesy Think Tank Photo. While the Spectral series from Think Tank Photo may not share the same elegance as this company’s Signature series, the new shoulder bags do weigh in with a couple of nice features I would have liked in the Signatures. On the other hand, a few of the trademark elements found in the Signature would have been welcome additions to this bag. (Click this link for my review of the Signature Series.) Still, all in all, the new bags have much going for them. I chose to review the smallest of these, the Spectral 8, since it’s primarily aimed at the mirrorless camera (as well as compact DSLR) user and I wanted to address a market segment I tend to overlook. The two larger bags, Spectral 10 and Spectral 15, address more robust DSLRs, but without grips.
Going Undercover The cover flap has a magnetic clasp. Nice touch. Pull a tab to release; just drop the flap back down and it should close on its own. I would have preferred this mode of closure to the metal buckles used on the Signature, although it doesn’t reflect the same level of chic. (I’m always afraid the metal buckles will come crashing down on the camera’s LCD when I use the Signature.) Lift the flap and you come to a small outer sleeve that will hold a cell phone of any popular size. Behind that is a zippered pocket designed to hold an 8” tablet, or accessories, such as maps, a guide book, and such. Sleeves within the pocket will hold spare batteries and a memory card wallet. (The larger bags will carry 10” tablets, and the 15” bag will carry a laptop.) Before we go inside, we encounter a secondary cover flap. As on the Signature, this one is zippered and designed to keep out prying hands, as well as the elements. Unlike the one on the Signature, it’s not pleated (which would have been nice – to accommodate lenses that protrude just a bit when standing on end). Open this second flap to access your gear. You can leave it open and fastened to the cover flap via a Velcro-style hook-and-loop attachment, or tuck it into a sleeve inside the cover flap. To be practical, don’t tuck this inner lid away. Instead, use that additional pocket as a “secret” compartment for valuables (it closes with hook-and-loop fastener). By the way, I prefer this arrangement to the one used in the Signature bags. If you use a sling strap that fastens to the camera’s tripod socket, you may be able to leave it attached, since there is enough room for it. One convenience feature carried over from the Signature line of bags is the trolley sleeve (luggage-handle pass-through). This lets you easily piggyback the bag on your roller luggage.
Conclusions Unlike the much more costly Signature series with its leather accents, the comfortably-priced Spectral series is low-key. Yet the Spectral does carry a certain degree of panache with it. More important than looks is functionality. The bag wears well and is easy to work out of. KEY FEATURES per Think Tank Photo
MATERIALS per Think Tank Photo Exterior: All fabric exterior treated with durable water resistant coating while fabric underside is coated with polyurethane for superior water resistance. The bag also has YKK RC Fuse (abrasion resistant) zippers, 420D velocity nylon, double PU coated P600D, heavy-duty nylon tarpaulin, UltraMesh pockets, antique plated metal hardware, Fidlock mangetic buckle, 350G 3D air mesh, 3-ply bonded nylon thread Interior: PE board reinforced removable closed cell foam dividers, 200D liner, PU backed nylex liner, 2x PU coated nylon 210T seam-sealed taffeta rain cover, 3-ply bonded nylon thread PRODUCT SPECIFICATIONS per Think Tank Photo Spectral 8
Spectral 10
Spectral 15
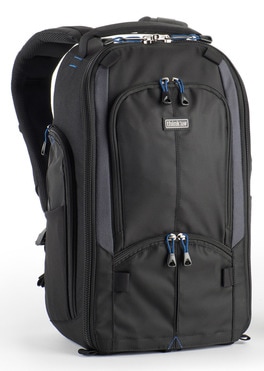 StreetWalker V2.0. Photo courtesy Think Tank Photo. StreetWalker V2.0. Photo courtesy Think Tank Photo. I used my original StreetWalker for a long while, eventually replacing it with MindShift Gear’s TrailScape 18L when that bag came along. What I liked about the StreetWalker (version 1.0) was its small size: It could easily fit under the seat of a commercial airliner and would be a comfy fit in a puddle jumper as well. But when the TrailScape came along, I figured, Hmm, a bit bigger and a roomy outer front pocket for a light jacket – OK, I’ll use this one when I need a smaller bag. Now that the StreetWalker V2.0 (SW V2) is here, I find myself switching back to this smaller pack. After all, if I need something larger, capable of storing a jacket and some extras, I still have my MindShift BackLight 26L, which I recently discovered will snugly hold my Nikon D500 with attached Tamron 150-600mm G2 lens (look for a review of both products soon). Think Tank also sent me the new StreetWalker Pro V2.0 (SW Pro V2) – the larger sibling in this family, but not the largest in this series by any means. There’s an even more spacious pack, the StreetWalker HardDrive V2.0 (which fits a full-size laptop), and new to the lineup, the StreetWalker Rolling Backpack V2.0 (roller and backpack in one). The two largest bags looked tempting, but I felt that two bags was enough to deal with for now. Inside and Out The new SW V2 and SW Pro V2 are roomier on the inside than their original counterparts and slightly larger overall. Other than that, the new models add room for a 10” tablet on the bag. The tablet sleeve is the same size on both bags. One of the problems I had with the original SW V2 (can’t recall if this also applied to the larger pack) was the small water-bottle pocket on the small bag. Think Tank addressed the issue in both V2 bags with an expanded, pleated zipped pocket behind the mesh pocket. Small water bottle? Use the mesh pocket. Large 32 oz Nalgene, use the zipped pocket. I would have preferred that the pockets were pleated all the way around to the bottom. That would make an easier fit for a large water bottle and allow for a grommet at the base. A bottle with cold water subjected to a warm, humid environment will form condensation, and that condensation will pool at the bottom. A grommet allows the water to safely drip free of the bag. The pocket on the left (with the bag on your back) has a small smartphone sleeve as well. I don’t know about you, but I carry my phone in a vest pocket, where I can easily reach it, not in the backpack, where it’s impossible to reach (unless you’re a contortionist) without taking the pack off your back. Some things appear cool on paper but are not very practical in the real world. One of the more subtle changes revolves around the main padded partition. It’s now hinged toward the bottom to make room for a second camera with lens attached. Simply swing the hinged section over to the right to make room. When carrying two cameras with attached lenses, this provides for a well-balanced carrying situation, which your back will thank you for. Obviously, this reduces your ability to carry very long lenses, but, hey, you can’t have everything – unless you switch to a larger-size pack. Any way you slice it, either bag is roomy enough to hold fast lenses attached to a DSLR, within limits. I would even venture to say that each bag could hold a medium-format camera, possibly with a lens, at the bottom. At the very least, the larger bag should hold two gripped DSLR bodies with attached lenses; the smaller one should accommodate one DSLR at the top and, on the bottom, one gripped body, each with lens. In Use Air-flow mesh padding in the back and shoulder straps was welcome relief on a hot muggy day as I found myself walking around several popular birding areas in the Chicago area, wearing the StreetWalker Pro V2, on a bird photography outing with a friend. I had the SW Pro V2 loaded with my Nikon D500 and Tamron 150-600mm G2 – lens attached, I might add, and resting comfy, cozy, and snug inside the pack. I also added a Nissin Di700A shoe-mount (which I’m also testing) and sling strap, that I sometimes left attached to the camera – or more correctly, the tripod mount for better balance. And yes, I kept the tripod mount attached to the lens. Otherwise, you tend to forget these things when you need them, or misplace them entirely. I also find it much easier to carry the camera by grabbing onto the mount, although at times I may cradle the camera, varying with the moment or the situation. The tripod mount was positioned fully downward inside the pack, an arrangement I found raises the entire assembly to the point where camera and lens practically hug the closed lid for a snug fit so things don’t bounce around. Still, as a further precaution, I tend to secure lens and camera with either an elastic band that attaches to either side surrounding and hugging the lens, or I position an unused padded divider over the lens barrel for this purpose. I should add that I left the lens shade reverse-mounted on the lens. The lens being this new, I take one more precautionary step – I slide the packing Styrofoam collar that came with the lens in place beneath the hood, just as it arrived from the factory, to prevent distorting the hood. It’s probably overkill, I know, and I may discontinue this practice, but it stands for now. One thing that bothered me about both bags: the lack of headroom above the camera. The D500 has a very deep grip. The Nikon D610 not so much, but it still had difficulty being comfortably seated in the smaller V2 pack. I almost gave up, till I realized I could reshape the central divider somewhat to make room. And that worked. I have the Tamron 24-70mm f/2.8 attached to the camera, and there appears to be room for a bulkier and longer lens in its place. The fit in the larger Pro V2 was also tight with the D500 in place, but not to the point where I had to make any further adjustments to the main divider. As for comfort level, I’m not sure why – and this will no doubt differ with the individual – I found the smaller of the two packs rides more comfortably on my back. Perhaps it’s due to the heavier load packed into the Pro V2. Then again, I’ve loaded the BackLight with the same gear, and it was a smooth ride – as good as it gets. It may have something to do with the added depth of the SW Pro. As a side note, I should point out that the added depth on the StreetWalkers offers one distinct advantage: It lets them stand upright easily, unassisted and without having to lean against something for support, without fear of the bag tipping over, which is certainly a plus.
FEATURES (per Think Tank Photo)
StreetWalker Backpacks V2.0
WHAT FITS (per Think Tank Photo) StreetWalker Pro V2.0
MATERIALS (per Think Tank Photo) Exterior:
PRODUCT SPECIFICATIONS (per Think Tank Photo) StreetWalker Pro V2.0 Internal Dimensions: 9.4” W x 17.3” H x 7.5” D (24 x 44 x 19 cm) Exterior Dimensions: 9.8” W x 18.5” H x 8.3” D (25 x 47 x 21 cm) Tablet: 7.7” W x 10.4” H x 0.4” D (19.5 × 26.5 × 1 cm) Phone Pocket: 3.9” W x 7.5” H x 0.6” D (10 × 19 × 1.5 cm) Weight: 3.5 lbs (1.6 kg) StreetWalker V2.0 Internal Dimensions: 9.4” W x 16.1” H x 6.3” D (24 x 41 x 16 cm) Exterior Dimensions: 9.8” W x 17.3” H x 7.1” D (25 x 44 x 18 cm) Tablet: 7.7” W x 10.4” H x 0.4” D (19.5 × 26.5 × 1 cm) Phone Pocket: 3.9” W x 7.5” H x 0.6” D (10 × 19 × 1.5 cm) Weight: 3.3 lbs (1.5 kg) Field Report: Think Tank Photo Signature 13 Shoulder Bag – Elegance and Functionality Combined4/11/2017
There are occasions when even a hard-nosed photo backpack user like myself must resort to a shoulder bag. In these times, sadly, backpacks may be seen as something other than the innocent carriers of your photo gear. There’s even one institution here in Chicago, namely Shedd Aquarium, where I’ve had the unfortunate experience of a security person literally ripping through my MindShift Gear photo pack to gain access, instead of simply using the zippers as intended – or asking me to open the bag. Happily, no harm done, except for some frayed nerves on this side of the inspection table (good thing MindShift uses high-quality hardware that resists such mistreatment). It was more intrusive than past TSA inspections I’d experienced (although maybe not as bad as some recently reported). In the past, I was very happy using my Think Tank Retrospective 5 Leather bag, although over time I’d come to realize the small size was both a boon and a bane, keeping me from carrying too much but often proving too small for anything more than the minimum of gear. Even a 15-30 f/2.8 or 70-300 attached to a DSLR was too much and the 24-70 f/2.8 on the camera just barely made it. So it was time to trade up. Thankfully, the Signature series entered the scene. Here I had a choice between two sizes. And this time I opted for the larger bag for one very good reason: The bag was longer and deeper than the Retrospective, but it still maintained a slim profile. That would remove the temptation to overfill the bag and also meant it would ride comfortably at my side, without bulking out. What’s more, as I was soon to find out, I could shift the bag around to my back when wearing it sling-fashion. Of course, as a shoulder bag, it lends itself nicely to being worn over the shoulder. In fact, this bag is almost perfect. Almost. Stylish Design Think Tank seems to have reinvented camera bag fabric when it came to the Signature series. This is a softly textured polyblend with the feel of finely woven wool. Unlike the Retrospective, this bag does not use Velcro-style hook-and-loop fasteners on the outside. In fact, I’d caution you to keep Velcro away from the exterior, as it may ruin that clean look (and, no, I didn’t test it, out of fear of ruining the bag). And if you’re wondering, the bag has been treated with a water-resistant finish. That aside, there is a rain cover included, which came in handy when I found myself pelted in a downpour. Enhancing this bag’s sophisticated appearance are leather accents. Soft leather graces the bottom of the bag. And there is leather on the carrying handle and shoulder strap, as well as the fastener straps. The buckle fasteners are metal, not plastic, further heightening the impression of quality. Advancing the impression that this is a well-crafted bag is this: There is not one stitch out of place, not one loose thread. The Interior This is where the Signature bag really shines, for the most part. The entire interior is Velcro-friendly. You can reposition the padded dividers to your heart’s content. Better still, they are more heavily padded than the typical Think Tank dividers. What’s more, the two central dividers are supportive enough to hold a camera upright, with attached lens facing downward. And if you feel you need more dividers, they’re included. I originally put these in storage, since I found the original set of dividers did the job well enough. Two things I did not like about the interior centered on the bottom of the bag. Instead of one contiguous cushioning base, there are two, what are essentially, padded dividers lining the bottom. And the bag lacks a stabilizing bottom platform to help keep the bag’s shape and prevent a sagging bottom, while offering enhanced protection to gear. So, I pulled the three extra padded dividers from storage and lined the bottom of the bag with them. Now the bag is firmer at the base and offers even better protection for my gear. Keep in mind that a soft-sided bag is intended to be pliable. A heavily padded, stiff outer shell would make the bag less convenient to carry. The back of this bag is the most heavily padded, enough so as to cushion you against bumps and practically prevent anything from bulging out intrusively. The front of the bag is more pliable, so keep the top of the camera to the front. That also places the grip on the right, for a quick grab. There is enough room in the Signature 13 for me to keep a BlackRapid sling strap attached to my Nikon D610. BlackRapid straps tend to protrude more than most sling straps when attached to a camera body, which is why it’s worth noting. A couple of more points worth noting. Unlike the Retrospective, the Signature bags feature an interior zippered lid. Keep this zipped when on the move, prior to reaching your destination or when in iffy spots to keep out prying hands. In theory, the top flap fully covers the top of the bag. In practice, the sides bulk out just enough to leave a tiny bit of the interior exposed on each side. Which is why you may want to keep the inner lid zipped when moving about, or in situations where dirt or debris or errant water drops or snowflakes might enter the bag. And speaking of this inner lid. I would have preferred two zippers to make it easier to open and close more rapidly. That aside, Think Tank thoughtfully designed it so that it could be attached to the main flap for quick opening when unzipped. And they’ve added another option: You can tuck the lid inside the bag, so it remains out of the way entirely. I prefer the first approach, since you can leave it attached to the main flap and still zip it open and closed. This inner lid, by the way, is pleated, making room for a lens that may stand taller than would ordinarily be accommodated.
KEY FEATURES per Think Tank Photo (with my comments in italics)
GEAR CAPACITY per Think Tank Photo (with my comments in italics) Signature 13
Signature 10
MATERIALS per Think Tank Photo Exterior: All fabric exterior treated with durable water resistant coating while fabric underside is coated with polyurethane for superior water resistance. The bag also has 240D wool-like 195G nylon/poly blend, full-grain leather, antique-plated metal hardware, highest quality YKK RC-Fuse zippers, 550D polyspun, nylon seatbelt webbing, neoprene, 3-ply bonded nylon thread. Interior: 210D silver-toned nylon lining, polyurethane-backed quilted Velex liner and dividers, high-density closed-cell foam dividers, 2x polyurethane coated nylon 210T seam-sealed taffeta rain cover, nylon binding, 3-ply bonded nylon thread. PRODUCT SPECIFICATIONS per Think Tank Photo Signature 13
Signature 10
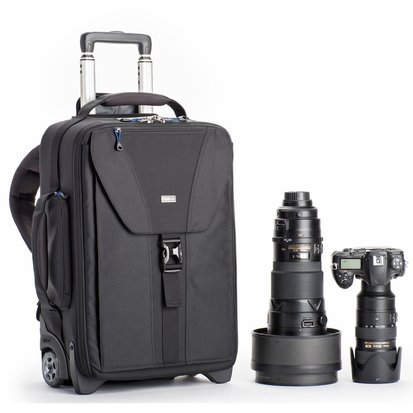 Not long ago, I reviewed the Airport Security V3.0 rolling camera case from Think Tank. I couldn’t sing its praises loud enough. Well, the TakeOff V2.0 may unseat the Security as my favorite roller, and here’s why. (For reasons why you should use a roller for your camera gear in the first place, I direct you to that earlier review.) At the outset we should point out that all of Think Tank’s Airport-series rollers are what we’d consider “soft-sided” luggage. That means it's fabric-covered and pliable yet quite rigid. Airport TakeOff V2.0 vs the Original Airport TakeOff On the surface, they appear to be very similar. You’d be hard pressed to tell the difference. However, there are a few noteworthy design changes, from what I can discern in the specifications. To begin, the new bag uses a 1680D nylon shell, which is better quality, higher density, and more abrasion-resistant than the 420D used in the original. Second, whereas both employ user-replaceable in-line skate wheels, V2 uses “high performance, 80mm super-quiet wheels with sealed bearings.” Not having used the original, I can’t speak to a quantifiable difference, but I can say that the new wheels are smooth-rolling and super quiet. The Airport Security uses the same wheels, so there was no need to put them through the same tests. Suffice to say, they pass muster on carpet, cracked pavement, and grass. Aside from that, the pocket that was originally inside the cover flap has moved to the outside, for faster access, except that it’s fully opaque nylon, not see-through plastic. There are also some cosmetic differences and the included tethered lock has been moved to the side, underneath the side padded handle. Airport TakeOff V2.0 vs Airport Security V3.0 The TakeOff has a smaller profile than the Security, so it should be a better fit in the overhead on smaller aircraft. That said, you should always check airline allowances before packing your gear and leaving for the airport. The Security is designed to serve as the name implies. The primary lock is built into the case, with both zipper pulls (the metal tabs) locking in place inside the combination lock – it’s an ingenious design! The tethered lock, however, is a standard combination lock and removable from the tether. Both are TSA-compliant (meaning TSA can easily unlock them if needed). The TakeOff features only a tethered combination lock, also TSA-compliant, but this lock is permanently attached to the tether. And the tether is much shorter here than on the other bag, if that matters. Also, as mentioned, the tether is found on the side of the bag, in contrast to the top-loading tether on the Security (not sure if that really makes a difference from a practical standpoint). The zippers to the TakeOff’s camera section are interlocking to accept the TSA combination lock. The front pockets on the two rollers are different, yet similar in some ways. Both will hold a laptop plus tablet. The laptop sleeve on the TakeOff is a smidge larger and appears to have thicker padding in front. The TakeOff will hold my 17” Gateway with protruding battery attached. This laptop is quite thick. The fit was snug, and removing the battery would have been a prudent move. The TakeOff features an organizer pocket, whereas, oddly, this feature is missing on the other roller. The biggest difference between the two cases is in how you access the outside compartments. On the Security, everything but the outer mesh front pocket, is zippered, with interlocking zippers – hence, lockable. The TakeOff lacks the large outer mesh pocket, and only the organizer pocket is zippered – but with no way to secure it. The laptop/tablet sleeves are accessible via a snap-closure mechanism – not at all difficult to get into when your back is turned. So you wouldn't want to leave the TakeOff with a stranger while you head to the restroom or while you step away for a quick cup of java. An even greater overriding concern for some of you: If you work with pro-grip DSLRs, then you'll definitely choose the deeper Security over the TakeOff. A point that should not be overlooked. The telescoping handle is fully exposed on the Security, whereas on the TakeOff it is hidden beneath a zippered flap, and for good reason. What really sets the TakeOff apart from the Security and other Think Tank Airport rollers is the built-in backpack harness. Why a Backpack Harness? Despite the fact that Think Tank does a really nice job with its padded handles, making them ultra-comfy and ultra-strong, there are times when you want to move more quickly and with better balance over uneven, perhaps gravelly, rock-strewn, or muddy terrain, and hand-carrying just won’t cut it. Carrying a roller by the handle makes you kind of wobbly. Besides, you may need your hands free to carry something else or to help you negotiate stairs or rough terrain. Enter the backpack harness. Unlike the traditional backpack harness found on rollers equipped with these straps, where you first have to attach the harness or go through some lengthy process of digging them out, using the harness on the TakeOff couldn’t be easier. Unzip a flap on the back, and voila! You’ve unveiled the backpack straps. They slide out and back in effortlessly. The first thing you’ll notice is that the flap leading to the harness secures to the bottom of the case and out of the way via hook-and-loop material, popularly known as Velcro. What you will notice is that these shoulder straps don’t extend all the way down to the bottom edge of the case – at least not from the outside. That means there’s no waist belt, which is unnecessary in this kind of arrangement. There is, however, a sternum (chest) strap to help secure the bag so it doesn’t shift weight as you’re trekking over rocky areas. Granted, this is a heavier setup than a traditional soft-sided backpack alone without wheels or cart handle. But you won’t be going on long hikes. You’re just donning the harness to negotiate a short stretch of difficult terrain, or to climb the stairs. (Advisory: never drag the case up stairs or lift it by the telescoping handle. Always hand-carry it in such instances, or use the backpack harness.) In Use Rollers traditionally have one failing. To allow for the wheelbase and telescoping handle, sections of the interior are raised, leaving what we might describe as wells or channels. You can simply work around that without it hampering you in the least. I arranged my gear in minutes. The interior lets you stash two bodies sans pro-grip with attached lenses and a whole slew of additional glass and one or two shoe-mounts besides. There are more than enough padded dividers and many of these are hook-and-loop compatible, letting you configure the interior to your heart’s content. As for the backpack straps… Well, keep in mind this is not a traditional backpack. Owing to the constricted way the straps extend outside the bag (not as loose as the traditional harness), the straps did pinch a bit under the arms, but not to the point of unbearable discomfort. You should try it out for yourself, as all body types are different. Remember: these straps are just a temporary means of traversing terrain that would prove difficult for wheeled luggage. In the main, wheeling this case along is just a dream.
Materials (per Think Tank Photo)
Exterior: For superior water-resistance, all exterior fabric has a durable water repellent (DWR) coating, plus underside of fabric has a polyurethane coating. The roller bags are also constructed with 1680D ballistic nylon, YKK RC Fuse (abrasion-resistant) zippers, custom designed extra tall skid plates, high performance 80mm super quiet wheels with sealed bearings, SpanKodra front pocket, rubberized laminate reinforcement, nylon webbing, and 3-ply bonded nylon thread. Interior: 210D silver-toned nylon, polyurethane backed Velex liner and dividers, 2x polyurethane coated nylon 210T seam-sealed rain cover, closed-cell foam and reinforced Specifications (per Think Tank Photo) Internal Dimensions: 13” W x 18.5” H x 5.3 – 6.8” D (33 x 47 x 13–17 cm) Exterior Dimensions: 14” W x 21” H x 8” D (35.5 x 53 x 22 cm) Laptop Pocket: 11.4” W x 16.3” H x 1.4” D (29 x 41.5 x 3.6 cm) Tablet Pocket: 9.8” W x 9.4” H x 0.8” D (25 x 24 x 2 cm) Weight: 7.0–8.7 lbs. (3.2–3.9 kg) depending on accessories used Where can I get more info/order this product? Think Tank Photo Manufacturer: Think Tank Photo How much is it? $369.75 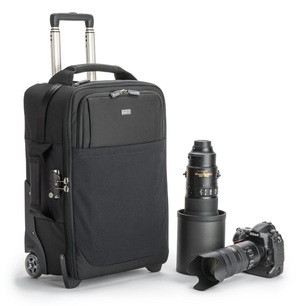 They may seem bulky, but rolling cases are a necessary evil for the traveling photographer and location shooter. While I prefer to carry my gear in a backpack, that doesn’t work for everyone, in every situation. And even I find myself switching to a roller when needed. Think Tank’s Airport Security V3.0 would be a top contender in such situations. Rollers vs. Everything Else I like to be flexible, and I prefer my portage gear to bend to the occasion. When I moved from New York to Chicagoland, roller cases saved the day. When I later moved again, from burb to burb, I used my rollers to move glassware (a padded case is better than those boxes movers sell you). I brought the gear over to the new digs in my photo packs, then transferred the gear to the rollers for storage. Rollers let you see everything when you open the lid. That’s the beauty of a roller. They’re also ideal for lighting equipment. Of course you could choose a shoulder bag. However, I’ve stopped using large shoulder bags a long time ago, finding them too unwieldy and uncomfortable. They cause some photographers to become stoop-shouldered after years of use. And I don’t see shoulder bags as being an easy fit on an airplane. That said, a shoulder bag is the easiest means of carrying and accessing gear on the fly, especially if you’re hesitant to set a bag down someplace, or need to work quickly. And, yes, Think Tank has lots of shoulder bags as well. But we’re getting off track. Once you step out of the vehicle with your luggage at the airport, a roller affords you the comfort of making your way from the front door of the terminal all the way to the gate without feeling any strain. But, sadly, many rollers are not very quiet or designed with travel in mind. Enter the latest iteration of Think Tank Photo’s definitive airline-friendly roller: Airport Security V3.0. Airport Security was designed primarily for domestic air travel. For international travel, Think Tank also introduced the smaller Airport International V3.0. And if you’re thinking commuter jets and regional airlines, Think Tank also debuted the more modestly sized Airport Advantage. Inside the Airport Security V3.0… Any way you slice it – but please don’t slice it; it’s luggage, not pizza, the Airport Security V3.0 was designed with the photographer in mind. It’s fully modular and fully padded on the inside. In fact, Think Tank throws in a number of extra dividers so you have total flexibility in how you configure the interior. As it comes to you, the bag is divided into three long channels, with numerous dividers running up and down each lane of camera traffic. In fact, you can stow two DSLR bodies with attached lenses, and, provided these lenses are not overly huge, you’ll have plenty of room for the rest of your camera gear. On a whim, I decided to see if my compact Photogenic monolight, standard reflector, and ION inverter would fit, along with cables and cords, a flash meter, plus some extras—and it all fit comfortably. Then I switched it back to a camera configuration. Let me tell you, it takes a lot longer to restore an original configuration (or something approaching the original) than to reconfigure it. There are also several see-through pockets inside the lid. And unlike a hardshell case, which provides eggcrate foam inside the lid, soft cases don’t have that luxury. So securing loose items is that much more important. That said, I haven’t found or heard anything bouncing around inside. More to the point, the many flexible dividers ensure a snug fit for everything inside this case. …And Outside Speaking of the lid. Frankly, this is the only feature I’m not thrilled with. It opens lengthwise, vertically – not like a typical suitcase. That’s a bit cumbersome, seeming to require more ground space when fully opened. Unless you lean the lid against something conveniently nearby, such as a chair or bench. Technically, this is a hybrid design, neither hard-shell nor soft-sided. The walls are fairly rigid, reinforced, protected by a durable, water-resistant nylon shell on the outside. The handles are secure, but again nylon and heavily padded, and very comfy. There’s one handle on top, another on the front. There are also two grab straps (opposite the handles) to help you maneuver the case in the overhead, or retrieve it. Never carry the case by these grab straps – that’s not their purpose. Outside Pockets There’s a small stretch pocket on the side. That’s not really designed for a water bottle, though it could hold a small one. The real purpose for this pocket is to secure a tripod, using the included straps. There’s also a large stretch pocket on the front, where you could keep that water bottle. More importantly, behind this stretch pocket is a large pocket. Here you’ll find organizer pockets, a padded tablet sleeve, and a much larger padded sleeve for a laptop. There’s one more little pocket on top, leading to a pleasant surprise. Security Is a Top Priority That little pocket? It holds a reinforced cable tether with TSA-compliant combination lock, so you can secure the case to any immovable object in your hotel room or wherever you happen to be. (Always exercise caution before leaving gear unattended. Better yet, don’t leave it unattended.) But what’s to stop someone from simply opening the case? To show you how well conceived this case is, just look at the two main zippers. They’re each tucked into a TSA-approved locking mechanism, which is governed by a combination lock. I don’t know who came up with this idea originally, but it’s ingenious! Even the laptop pocket uses interlocking zipper pulls. You’ll have to buy a separate lock for this, and make sure it fits the tiny aperture. One more nice security feature: each case comes with a serial number. Take a picture of it with your phone and keep it handy for a worst-case scenario – one you never hope to encounter. In Use What’s a roller without a good set of wheels? First, the wheels and related components are all user-replaceable. Now, the wheels themselves are quiet as the proverbial mouse. I wheeled this baby over carpeting, tile, cracked and bumpy pavement, cracked asphalt, and grass. It was quieter than speaking in hushed tones at the library. And it handled all impediments with aplomb. Yes, grass did slow it down a bit, but not by much. The telescoping handle was comfy enough and remained extended despite leaning down on it. I didn’t find the case straining to twist and turn at every opportunity when using the handle fully extended. I should also add that the handle reached a comfortable height. (Advisory: never drag the case up stairs or lift it by the telescoping handle. Always hand-carry it in such instances.)
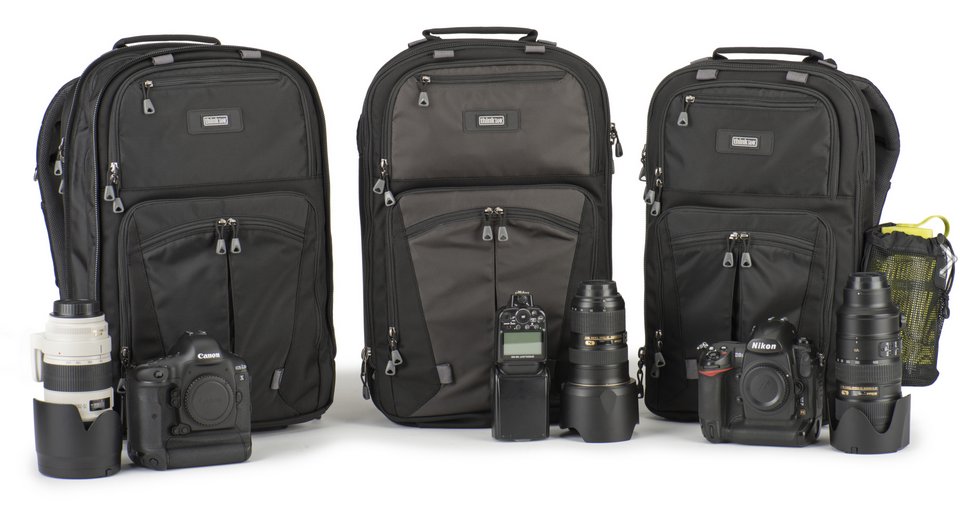 Think Tank Photo's new Shape Shifter V2.0 series. Photo courtesy Think Tank Photo. Think Tank Photo's new Shape Shifter V2.0 series. Photo courtesy Think Tank Photo. Until now, my favorite photo backpack from Think Tank Photo was the StreetWalker. The original StreetWalker is compact enough to make it onboard practically any flight as a personal item, if you play your cards right. The Shape Shifter V2.0 might not make it as a personal item, but it will certainly fit in the overhead. Of course, you should check with your preferred airline prior to each flight, as carry-on regulations can change at a moment’s notice. What sets the Shape Shifter apart from other packs is its morphing design. It starts out with a tapered look, but unzip the bag and it expands to hold your gear, going from 3 inches in depth to 7 inches. Apart from that, the bag wears just like any photo backpack. An In-Depth Look: Let’s Start Outside The Shape Shifter V2.0 has what’s needed for a comfortable hike or walk around town. Namely, it begins with contoured shoulder harness, sternum (chest) strap, and waist belt. The included waist belt is not padded, but it works fine. It’s not removable in the usual sense, as it lacks clips. On the other hand, it can be removed with some effort. However, if you lift up the hook-and-loop-fastened bottom flap (which is padded to protect the bag at the bottom), you’ll reveal a hideaway behind the lumbar pad. If you don’t use the waist belt, then tuck it away. If you remove it, you can replace it with the padded Pro Speed Belt V2.0 (Think Tank, $41.75 - make sure to order in the right size). Instructions come with the pack for replacing the waist belt. The Pro Speed Belt is designed to carry extra gear, courtesy of the numerous attachment loops on the belt. The back of the pack is comfortably padded, with an airflow design that makes it breathable. The shoulder straps are similarly configured to be breathable. And while the pack doesn’t have side compression straps normally found on outdoor packs, it does benefit from shoulder compression straps for a more personal fit. Another nice thing: the shoulder straps didn’t slip off my shoulders, which such straps have a tendency to do. That meant I didn’t have to use the chest strap, although to be thorough, I did carry the bag with all straps attached. It was a comfortable arrangement. The main compartment has a single zipper. All other zippers are paired, and many are lockable. If you want to use the pack as a daypack, for clothing and travel essentials, then you’d do best getting the Naked Shape Shifter. I would imagine that you could easily use the Naked Shape Shifter as a weekend getaway pack without adding any pouches. The Naked Shape Shifter is essentially the same pack as the one I tested, minus the sewn-in accoutrements. Each Shape Shifter pack comes with a removable mesh water bottle pocket on the outside. I don’t know about the 15-inch Shape Shifter, but the pouch on the 17-inch version is large enough to easily hold my 32-ounce Nalgene. And the mesh means that condensation on the bottle’s exterior will be able to evaporate without the water forming puddles. Before we open the pack, I did want to point out that the bag is surprisingly heavy, considering it lacks the usually dense padding inside and on the front and sides. But that’s also a sign of solid construction. As mentioned, the back is fully padded. When expanded, the bag reveals an unpadded nylon shell along the top and sides. For this reason alone, I’d hesitate to take this pack on a strenuous outdoor hike where a backpack might be knocked about. But then again, that was never the design for this bag. It can easily take some jostling on a crowded bus or subway car. Plenty of Pockets One reason to love this bag: there are lots of pockets. First, there are 3 roomy pockets inside the front lid. Now move to the outside of the bag and you’ll find an abundance of pockets. For starters, there’s a padded sleeve that will hold a 17-inch laptop, along with a tablet in a separate padded sleeve – all in a section immediately to the rear of the main section. If you don’t carry a laptop, stick a jacket in here, or maps. There’s a separate semi-padded tablet sleeve on the front of the bag. In fact, this sleeve offers protection for the camera gear, given the padding. I stuck the included rain pouch in a small upper outer pocket for additional padding from the front. There’s also an organizer pocket. There’s even a pocket to hold the tripod legs, when carrying the tripod over the front of the bag (actually, this is the only way to carry a pod with this bag). That pocket can also be used for other stuff, since the included tripod straps should hold a lightweight tripod securely top and bottom (tripod straps included). On the Inside The expanded bag is deep enough to hold my rather girthy Tamron 15-30mm f/2.8. However, the bag is not really designed to hold a camera with attached lens, and for me that was originally the deal-breaker when Think Tank first introduced the original Shape Shifter. I prefer keeping one lens attached to the camera, so I can be ready to shoot at a moment’s notice. Still, not all situations require your camera to be constantly at the ready, and I was willing to give this a shot. And having said that, the new neoprene wrap may fit a body with a compact lens attached. I just didn’t feel it was worth the effort, since I’d have to swap lenses once I’d reached my destination. In addition to the wrap, there are 4 pockets of varying size. I fit a Tamron 70-300mm zoom, Tamron 15-30mm f/2.8, and Nikon SB-700 flash in the pockets, with my Nikon D610 going inside the wrap. I still had one pocket available. I added a small padded divider to the bottom of the lowermost pocket to further pad that lens against bumps in the event I set the pack down a bit too hard. I would have done likewise with the other lower pocket had I used it. There was also room for a sling strap. If you have small lenses, simply wrap them well and double up to take advantage of the available room. Or if you stack them, add an unused padded divider or other padding between them. These pouches may be sewn in place, but they still leave room for some astute arrangements. The 17-inch standard version leaves you plenty of room to throw in a jacket and some other stuff. And despite what you’re told in the introductory video on the Shape Shifter page, never ever put a water bottle inside a camera bag. And don’t put food inside the neoprene pockets, or you may find crumbs mixing with your lenses – a bad combination. For that matter, I wouldn’t put food anywhere inside the bag if you’re carrying camera gear—accidents do happen, and you wouldn’t want your trail mix mingling with your camera and lenses. In Use Working out of the bag was a charm. Granted, I still would have preferred to be able to use the bag with camera and my lens of choice attached, but I easily worked around that. This bag comes in really handy if you don’t like to carry too much gear. You can still fit a second camera body in the pack, in place of one lens. But all in all, the gear carried is modest in scope and size. No really long, fast lenses here. This is a pack geared toward a DSLR, with or without grip. Most mirrorless systems will be swimming in the available space. One recommendation. It’s very easy to forget to zip a bag or pocket. One solution is to standardize on how you employ the zippers. For faster access, the left and right zippers should meet at the apex or middle. When it rains, I tend to move them to one side. In other words, I keep all the zippers either centered or on the same side, so a quick glance can tell me that everything is secure. By the way, a rain pouch is included, but I use these only during a downpour. You shouldn’t need it in a light rain.
|
ReviewsTECHNICAL EDITOR
|

 RSS Feed